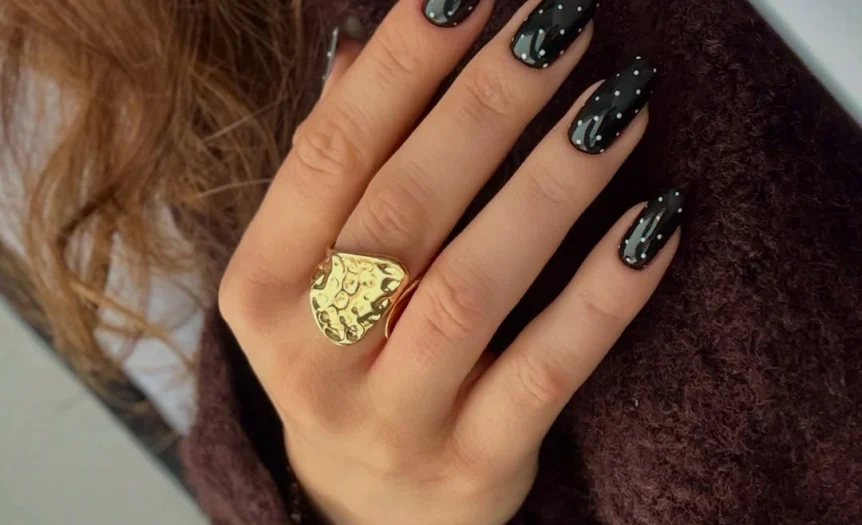
Playful polka dot fall nails 2026 are making a strong case for the idea that autumn manicures do not have to be serious. When the weather turns cooler, do you automatically reach for burgundy, brown, and black? I love those shades too, but this season I am much more interested in what happens when classic fall colors meet tiny dots, glossy finishes, metallic details, and unexpected color combinations. The result feels playful without looking childish, which is exactly the sweet spot I want from a manicure.
The beauty of polka dots is that they can completely change personality depending on the base. A sheer pink suddenly looks more graphic, olive green feels fashion-forward, and a silvery finish becomes almost futuristic. So which version works for everyday fall, and which one deserves a little extra attention for a dinner, party, or weekend away? These are the playful polka dot fall nails 2026 I would save now and bring to my next appointment.
Silver Almond Polka Dot Nails With a Frosted Fall Finish
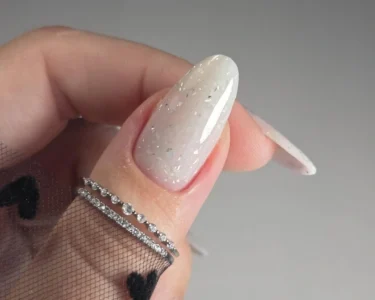
I would start the season with this cool-toned almond manicure because it has that slightly mysterious September-to-November feeling without leaning into predictable autumn shades. The nails are long and softly pointed, with a translucent silvery base that catches the light almost like fine metallic dust. Small dark dots are scattered across the surface, while a few tiny reflective accents add another layer of sparkle. I especially like the contrast between the icy background and the almost charcoal-looking dots. It makes the manicure feel polished, but there is still a little mischief hiding in it.
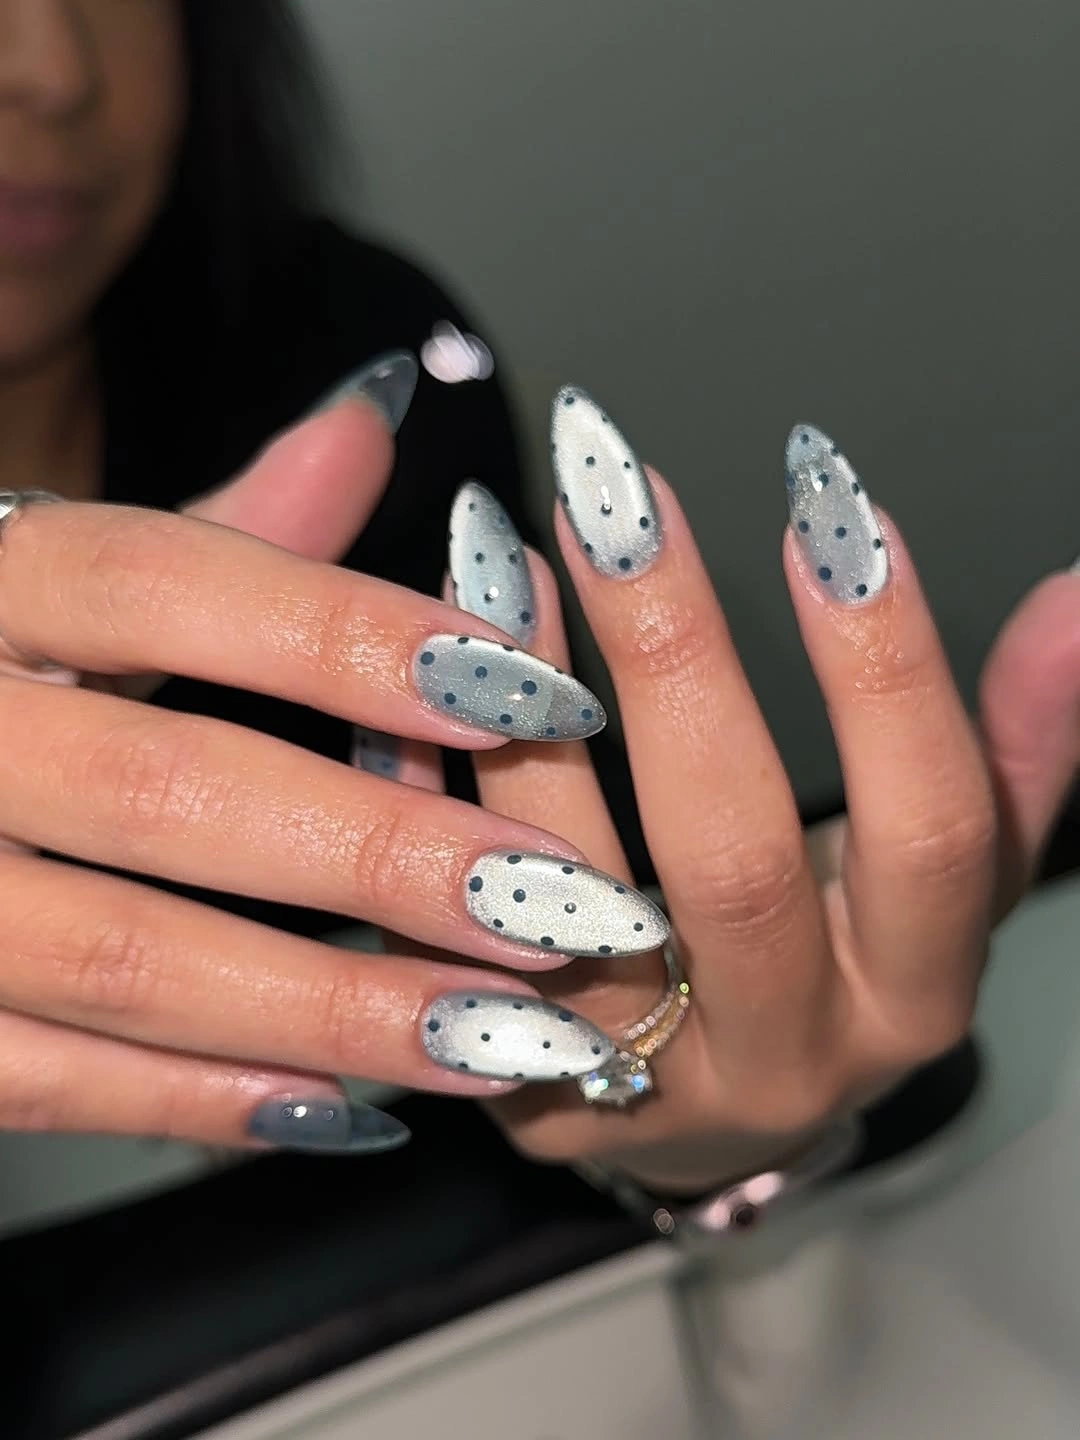
For this look, I would ask for an almond shape and a sheer silver or pearl chrome base rather than a completely opaque metallic polish. OPI Put It In Neutral or Funny Bunny can work as a soft foundation, while a chrome powder such as OPI Chrome Effects in a silver-toned finish creates that reflective surface. For the dots, I would use a deep navy, charcoal, or black gel polish and a dotting tool. Tiny silver rhinestones are optional, but they are a nice finishing touch if I want the manicure to feel more evening-ready.
At home, I would keep the dot placement intentionally imperfect. After applying the base and curing it, I would make dots in several sizes, leaving enough negative space so the design does not become visually crowded. I would finish with a glossy top coat and cure everything carefully. The trick is restraint – too many perfectly identical dots can make the manicure look stamped rather than styled.
Soft Pink Square Nails With Classic White Dots
If I wanted a softer interpretation of playful polka dot fall nails, I would go straight for this blush-pink design. The nails are medium-length and squared with slightly softened corners, which keeps the manicure practical while giving the pattern a crisp frame. A translucent dusty-pink base covers the nails, and bright white dots are placed across the surface in a loose, cheerful pattern. The combination feels almost retro, but the glossy finish keeps it modern. It is the kind of manicure that could look equally cute with a chunky cardigan or a tailored blazer.
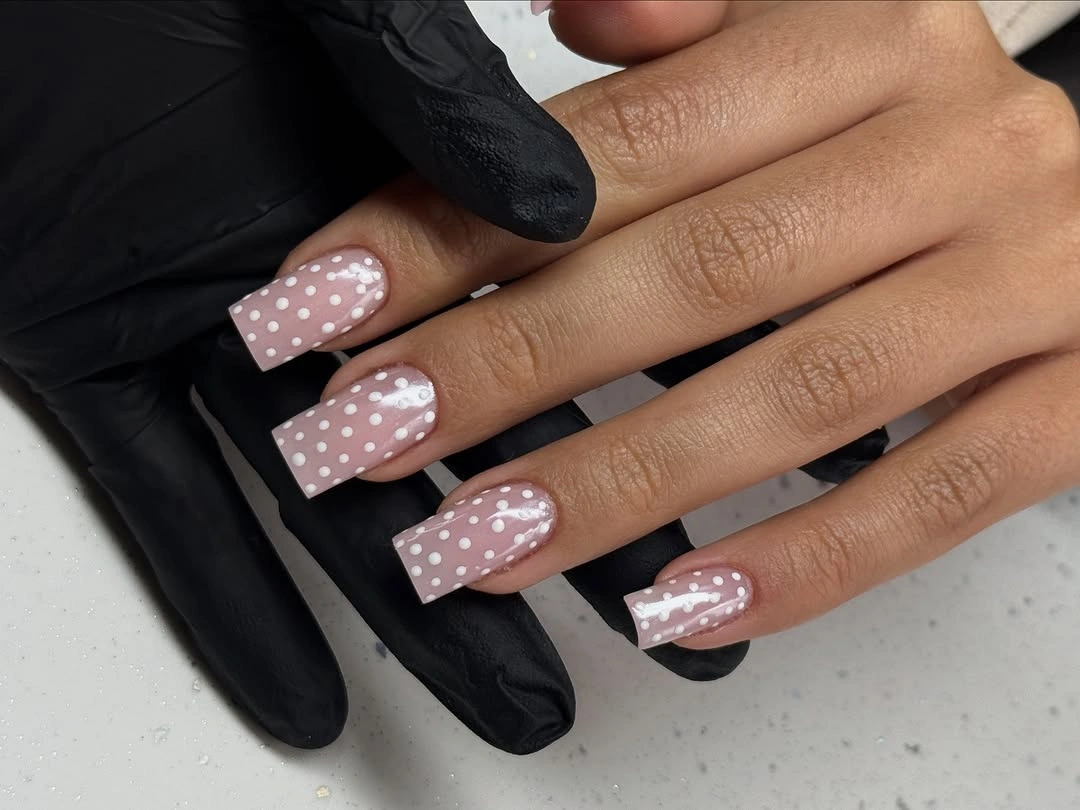
I would keep the materials simple here. A sheer blush polish such as Essie Ballet Slippers or OPI Bubble Bath gives me the delicate base I want, while a bright white polish like Essie Blanc works nicely for the dots. I would also keep a small dotting tool nearby because the different dot sizes are what give the manicure its relaxed character. A high-shine top coat is important – without it, the design can lose some of that fresh salon finish.
My approach would be to apply two thin layers of the pink base, allowing each layer to dry or cure properly before adding the dots. Then I would place larger white dots first and fill the empty spaces with smaller ones. I would not try to make the rows perfectly symmetrical. That little bit of randomness is what makes polka dots feel playful instead of overly formal.
I have always thought pink manicures can work beautifully in fall when the shade is muted enough. This particular version would be my choice for someone who likes seasonal beauty but does not want to abandon feminine colors once September arrives. Add a camel sweater, gold jewelry, and a glossy lip, and suddenly the whole thing feels very put together without trying too hard.
Pink Chrome Almond Nails With Tiny Black Polka Dots
Here is where I would take the polka dot idea in a more polished direction. The almond-shaped nails have a translucent pink base with a pearly chrome effect that shifts softly under the light. Tiny black dots sit across the nails in a deliberate but not rigid arrangement, creating a graphic contrast against the delicate background. I love this combination because it gives me two moods at once – the pink and shimmer feel romantic, while the black dots add just enough edge to keep everything from becoming too sweet.
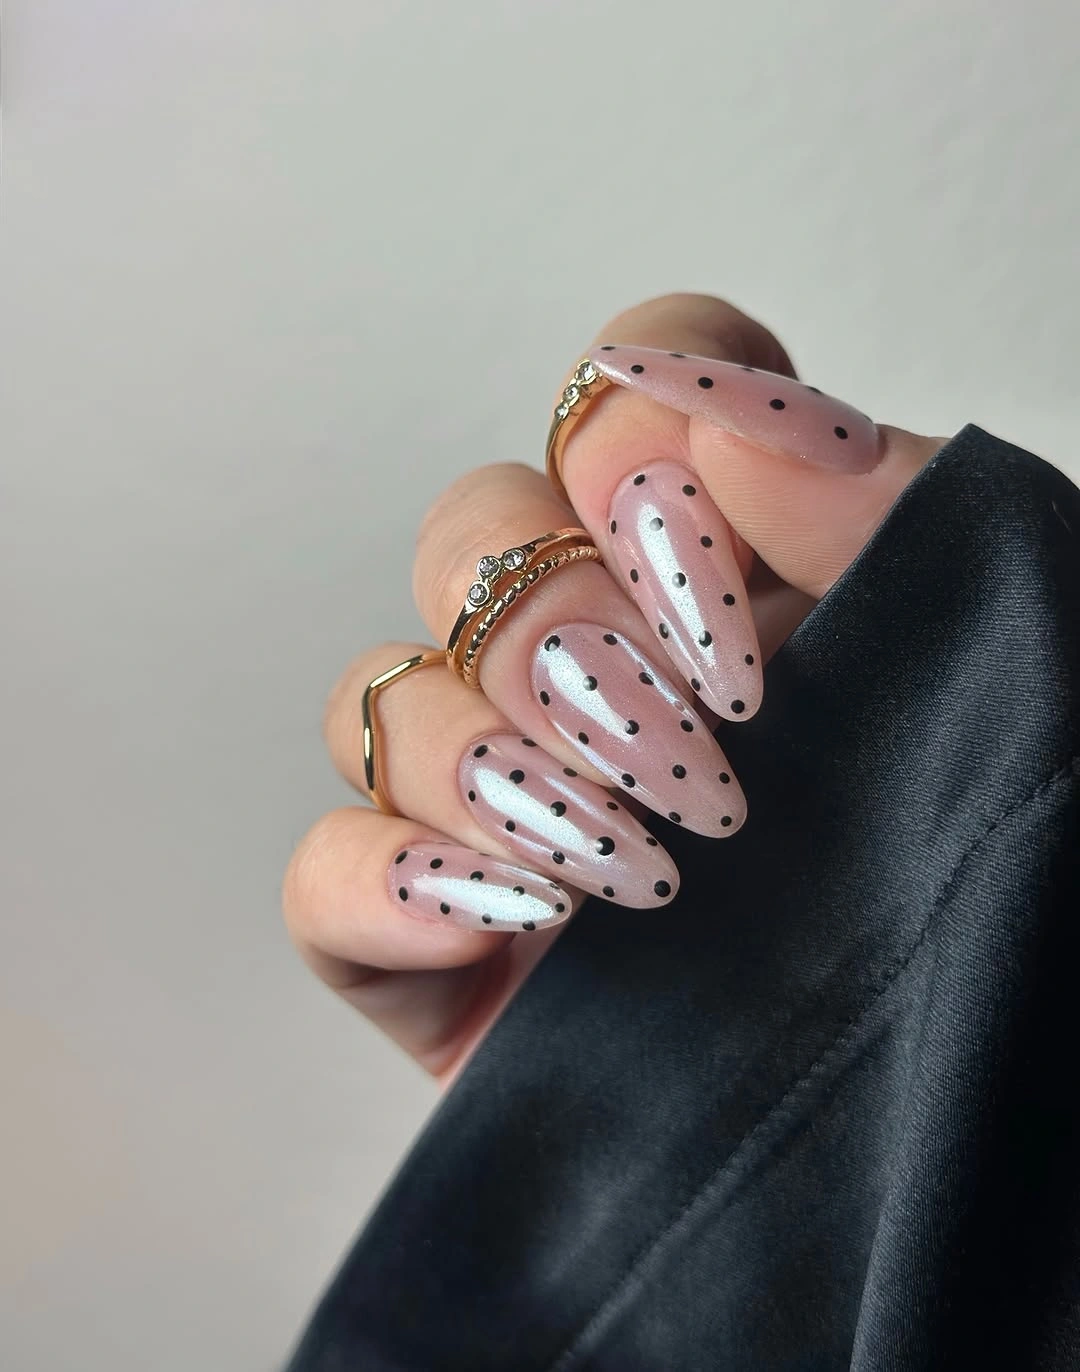
For the base, I would choose a milky pink gel polish with a fine pearl or chrome finish. OPI Funny Bunny layered with a sheer pink can create a similar soft effect, while a chrome powder gives the surface that reflective glow. For the dots, I would use a highly pigmented black gel polish and a fine dotting tool. A glossy no-wipe top coat will help preserve the smooth chrome-like finish and make the black details look especially crisp.
I would shape the nails before beginning the design because the almond silhouette is a major part of the finished look. After applying the pink base, I would cure it, add the chrome effect if using one, and then place the black dots in a slightly varied pattern. I would keep them small rather than letting them dominate the nail. When I finish with top coat, I would check the sidewalls carefully because chrome manicures look much cleaner when the edges are neat.
Short Multicolor Polka Dot Nails For a Cheerful Fall Twist
Not every fall manicure needs to be moody, and this short rounded design proves it. The nails have a sheer natural-pink base covered with tiny dots in bright pink, orange, yellow, green, blue, purple, and black. Because the nails are short and softly rounded, the colorful pattern feels particularly wearable. Instead of choosing one dominant shade, the manicure turns the entire nail into a little collection of color. It reminds me of the kind of playful detail that can make an otherwise simple outfit feel much more considered.
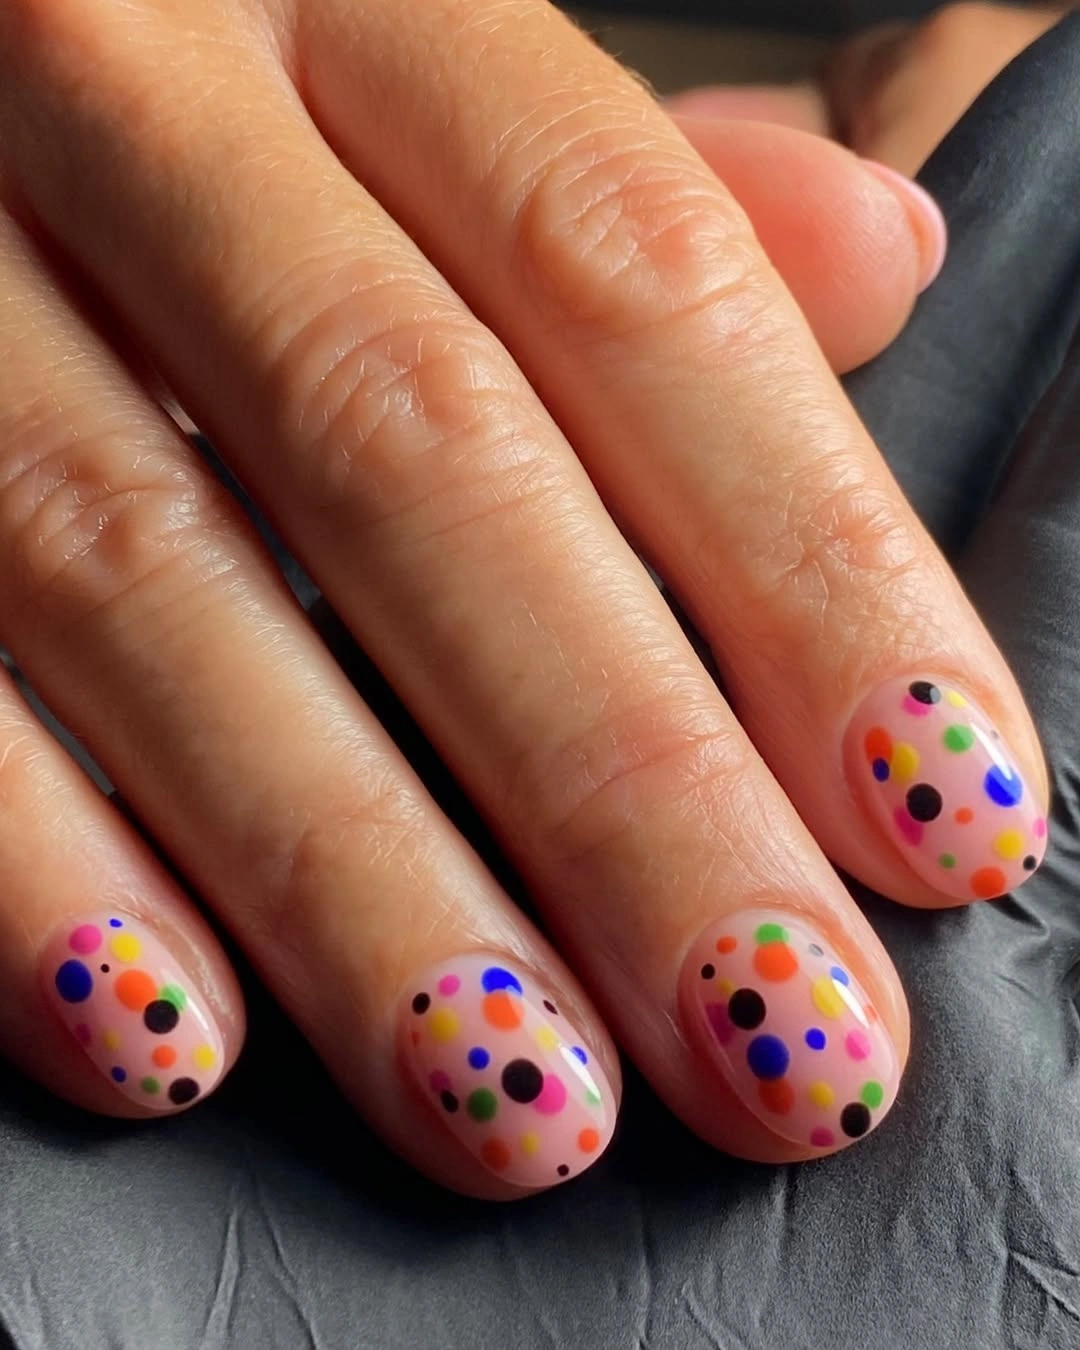
I would use a sheer nude-pink base and several highly pigmented polishes for the dots. OPI, Essie, and Sally Hansen all offer enough individual shades to build a custom palette, so I would not worry about finding a single multicolor set. For fall, I might slightly soften the palette with mustard yellow, tomato red, forest green, cobalt, and dusty pink instead of using only neon colors. That tiny adjustment makes the design feel more seasonal.
The easiest way to create it is to work one color at a time. I would place a few larger dots around the nail first, then add smaller dots in the gaps with a fine dotting tool. There is no need to make every nail identical. In fact, I think repeating the same pattern too precisely takes away some of the charm. Once everything is dry or cured, I would seal it with a glossy top coat.
Olive Green Almond Nails With Metallic Polka Dot Details
Olive green feels almost made for fall, but I like seeing it used in a fresher way than the usual solid manicure. Here, the almond nails are coated in a muted olive-green shade and decorated with small metallic dots that catch the light across the surface. The shape is elegant without being extremely long, and the glossy finish gives the earthy color a surprisingly sleek quality. It feels autumnal, but not in the obvious pumpkin-and-leaves way.
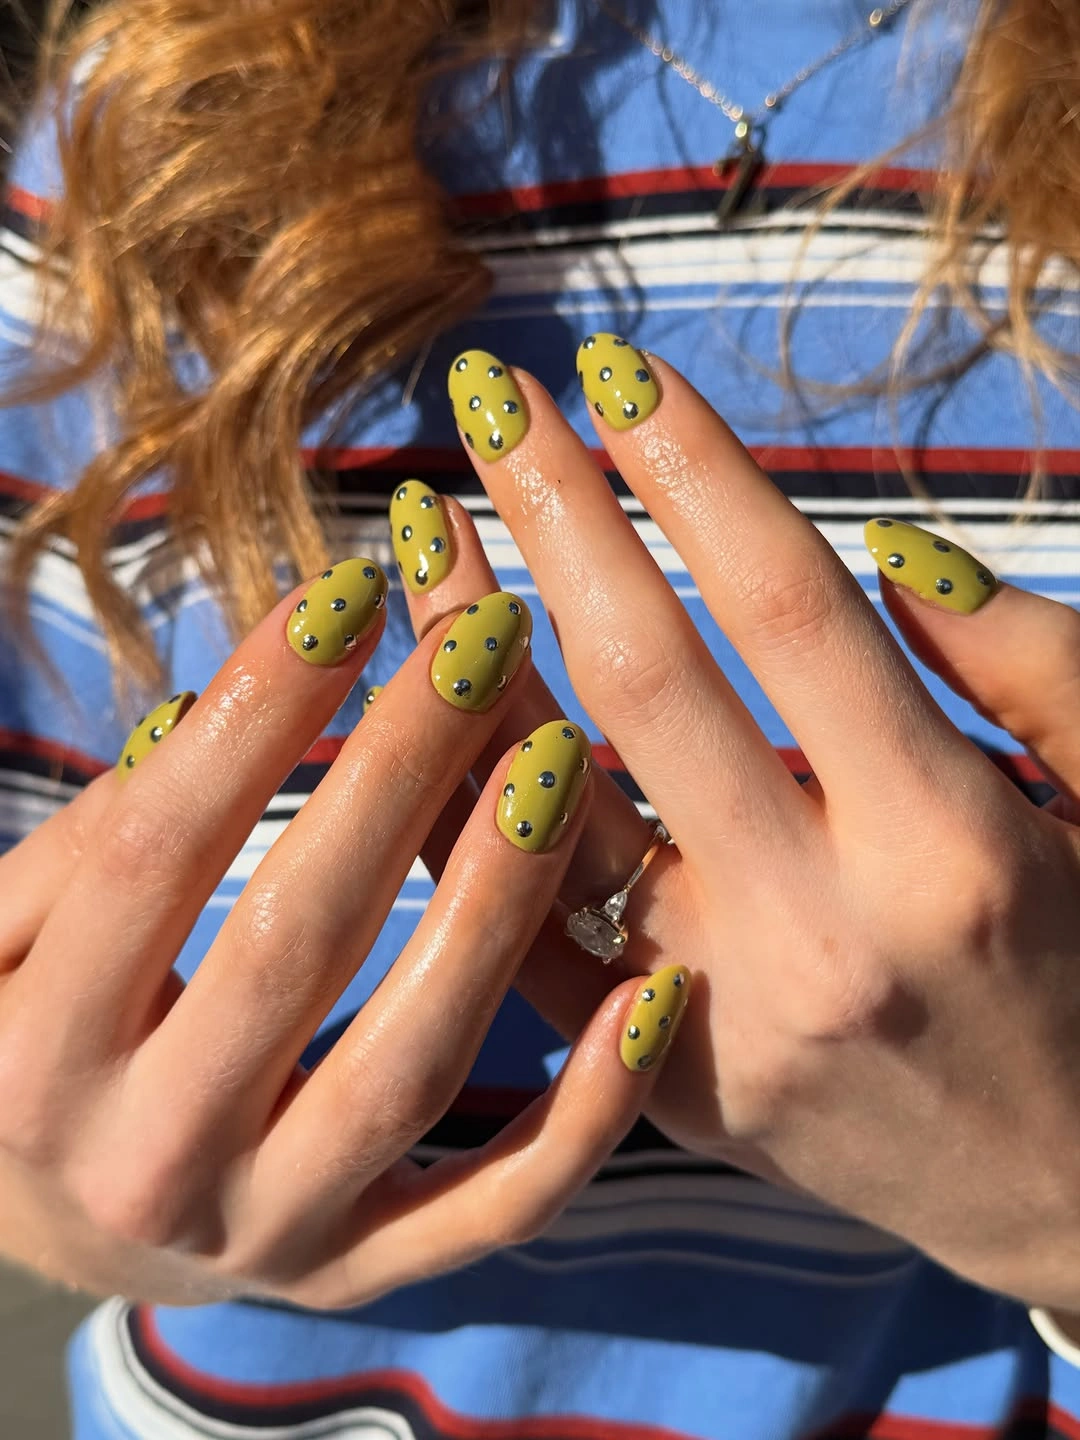
For the base, I would look for an olive or moss-green polish with a creamy finish. Essie Win Me Over or a similar muted olive shade would give me the right starting point. The dots can be created with metallic silver gel polish, tiny silver nail art studs, or a chrome-like polish applied with a dotting tool. I would keep the metallic elements small so they read as little flashes of light rather than heavy embellishment.
I would shape the nails into a soft almond first, then apply the olive color in two thin coats. Once the base is completely set, I would add the metallic dots in varying sizes, concentrating slightly more detail toward the center and upper portions of the nails. A glossy top coat pulls everything together and makes the green look richer. If I were doing this at home, I would take my time with the dot placement – olive polish is forgiving, but uneven edges are much more noticeable on a design this clean.
Champagne Glitter Polka Dot Nails for Cozy Fall Nights
I love how this manicure turns tiny black polka dots into something much more glamorous. The nails are softly almond-shaped with a translucent champagne base packed with fine shimmer, giving the manicure a warm metallic glow. The black dots are scattered across the surface rather than arranged in strict rows, which keeps the finish relaxed. It feels made for candlelit dinners, chunky knits, and the first genuinely chilly evenings of fall.
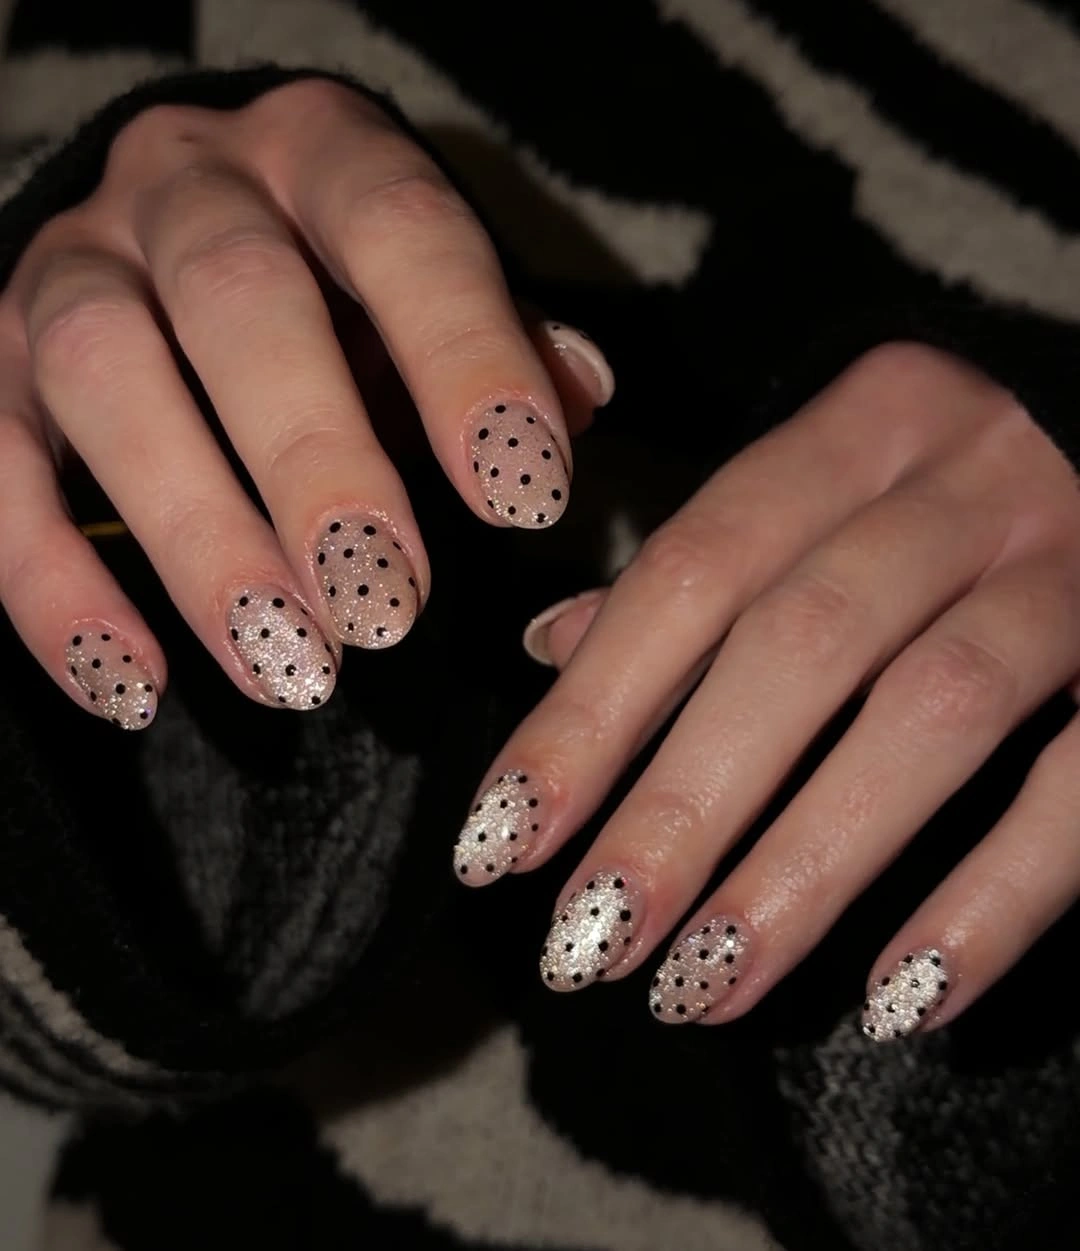
For the base, I would use a sheer nude polish mixed with fine champagne glitter, plus a deeply pigmented black polish for the dots. A small dotting tool makes it easy to vary their size. I would finish with a thick glossy top coat to keep the shimmer looking smooth rather than textured.
I would apply the glitter base in thin layers, cure it, and then add black dots in a loose pattern. I prefer starting with the larger dots and filling the empty spaces with smaller ones. The less mathematical the arrangement, the more effortless the result feels.
For me, this is the perfect transition manicure when summer sparkle still has a place in my wardrobe but fall colors are beginning to take over. It has warmth, shine, and just enough attitude.
Red French Tips With a White Polka Dot Border
This manicure gives the classic French tip a playful little twist. The nails are almond-shaped with a sheer pink base and vivid red tips, but the real detail is the row of tiny white dots tracing the curve between the natural-looking base and the red. It is graphic, clean, and surprisingly festive without becoming a holiday manicure too early.
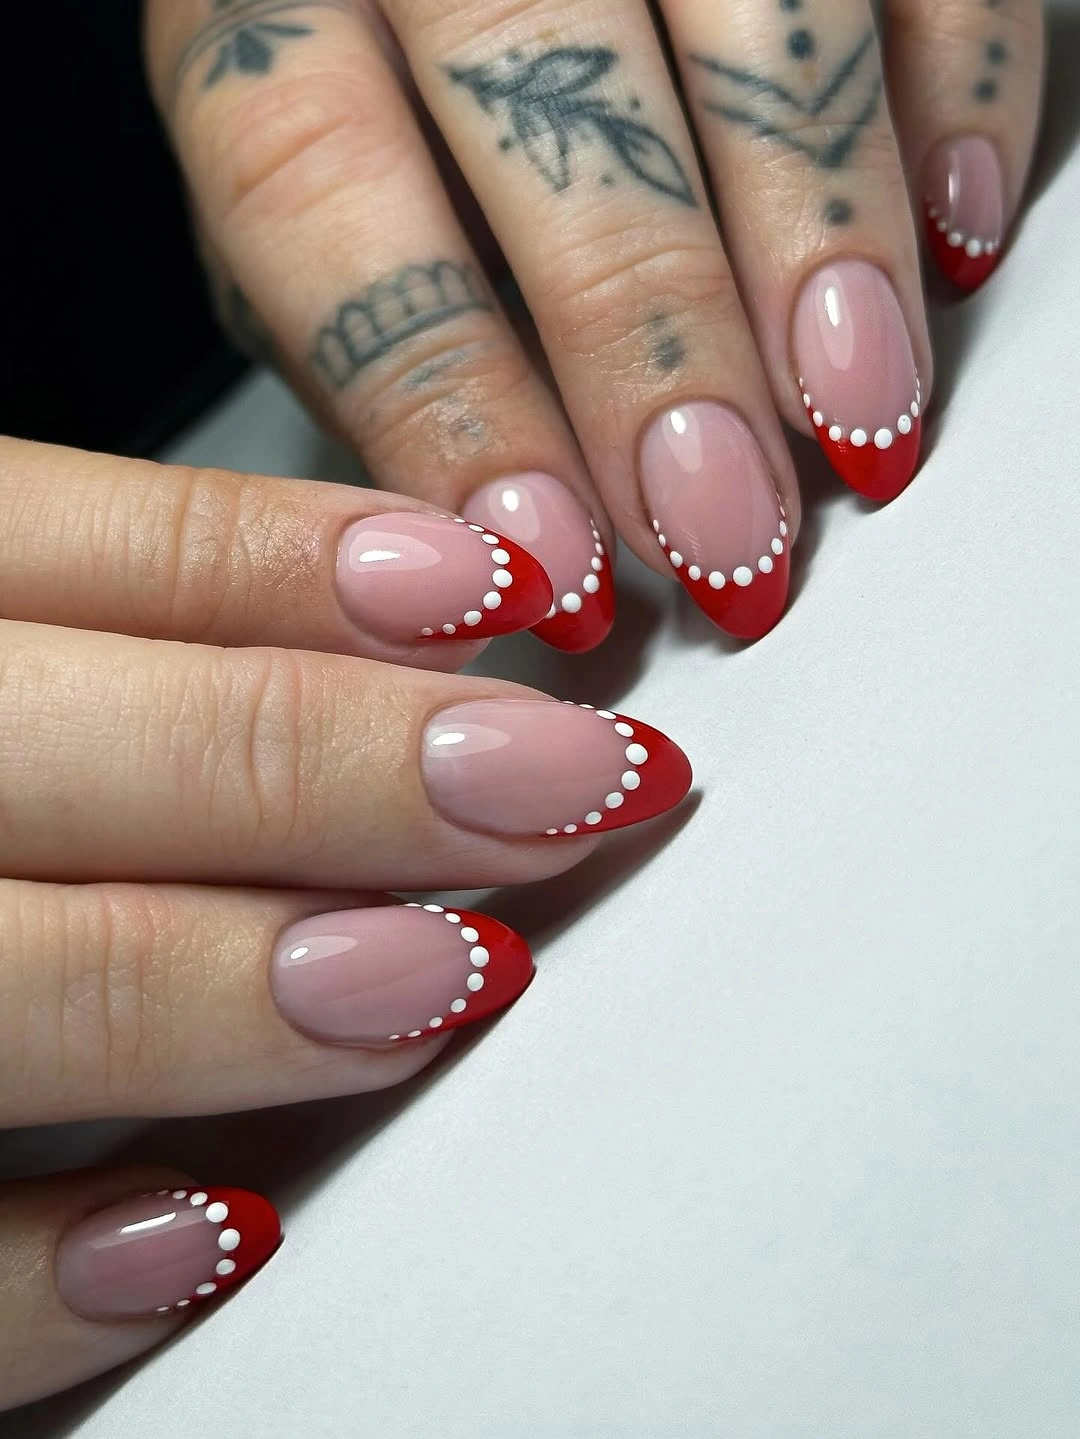
I would reach for a milky pink base, a true cherry-red polish, bright white polish, and a fine dotting tool. Essie Ballet Slippers paired with a classic red shade can create the right contrast, while a glossy top coat keeps the French tip crisp.
After shaping the nails, I would create the red tips first and let them set completely. Then I would place small white dots along the curve, keeping them close together but not touching. A steady hand matters more here than complicated equipment.
This is one I would save for October and November when red starts feeling especially right. It has the polish of a classic manicure but enough personality to make a simple sweater-and-jeans outfit feel instantly sharper.
Sheer Pink Nails With Silver and Mauve Dot Accents
Here is a softer take on the trend. The almond nails have a translucent pink base decorated with raised silver and muted mauve dots, creating a delicate three-dimensional effect. Some dots look almost like tiny pearls, while the reflective pieces catch the light as the hands move. The overall effect is feminine without being overly sweet.


e.l.f. Halo Glow Liquid Filter
A glow-enhancing complexion booster for soft-focus makeup looks.
Check Price on AmazonAs an Amazon Associate, Lady Lana Beauty earns from qualifying purchases.
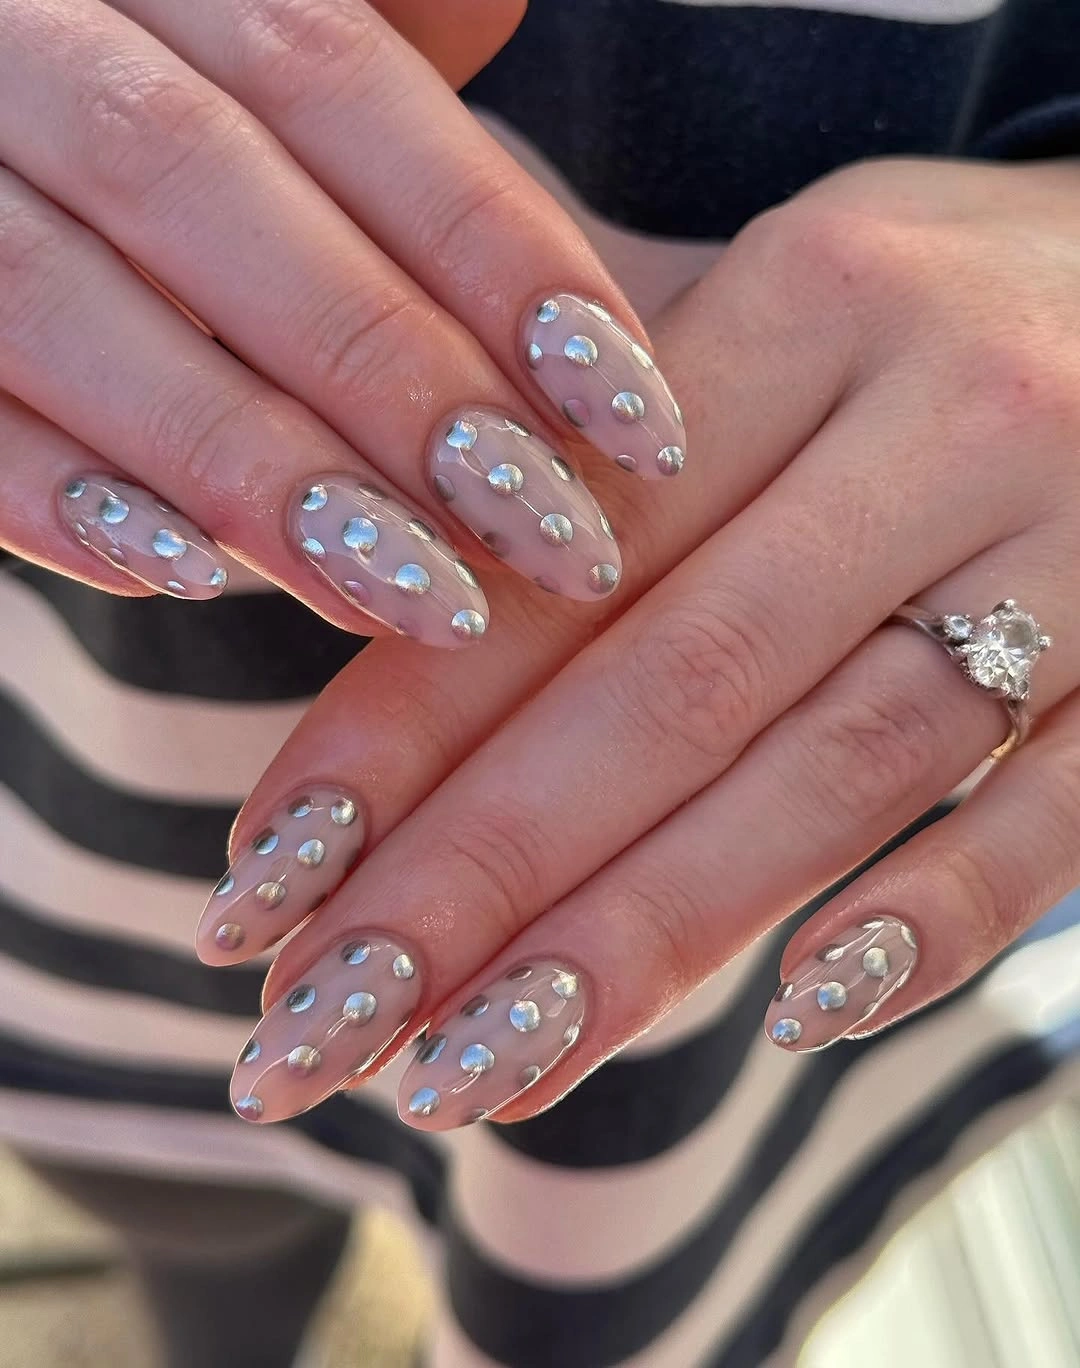
I would use a sheer blush gel, small silver nail embellishments, mauve gel polish, and nail art adhesive if the raised pieces need extra hold. A clear builder gel can also help create a slightly dimensional finish. I would keep the pink base very transparent so the details remain the focus.
The easiest approach is to finish the pink base first and then place the silver and mauve accents in alternating sizes. I would avoid covering the entire nail too densely because the negative space is what makes this design look elegant.
I see this as a lovely option for anyone who wants fall nail art without dark colors. The cool metallic details work beautifully with gray, cream, soft brown, and dusty pink – basically all the cozy neutrals I reach for once the weather changes.
Red Black and Pink Mixed Polka Dot French Nails
This is where playful really earns its place. Long square nails combine several patterns at once, including red-and-white stripes, black sections with pink dots, and pale pink French-style tips covered in contrasting polka dots. The designs are different from nail to nail, but the limited red, black, pink, and white palette keeps everything connected.
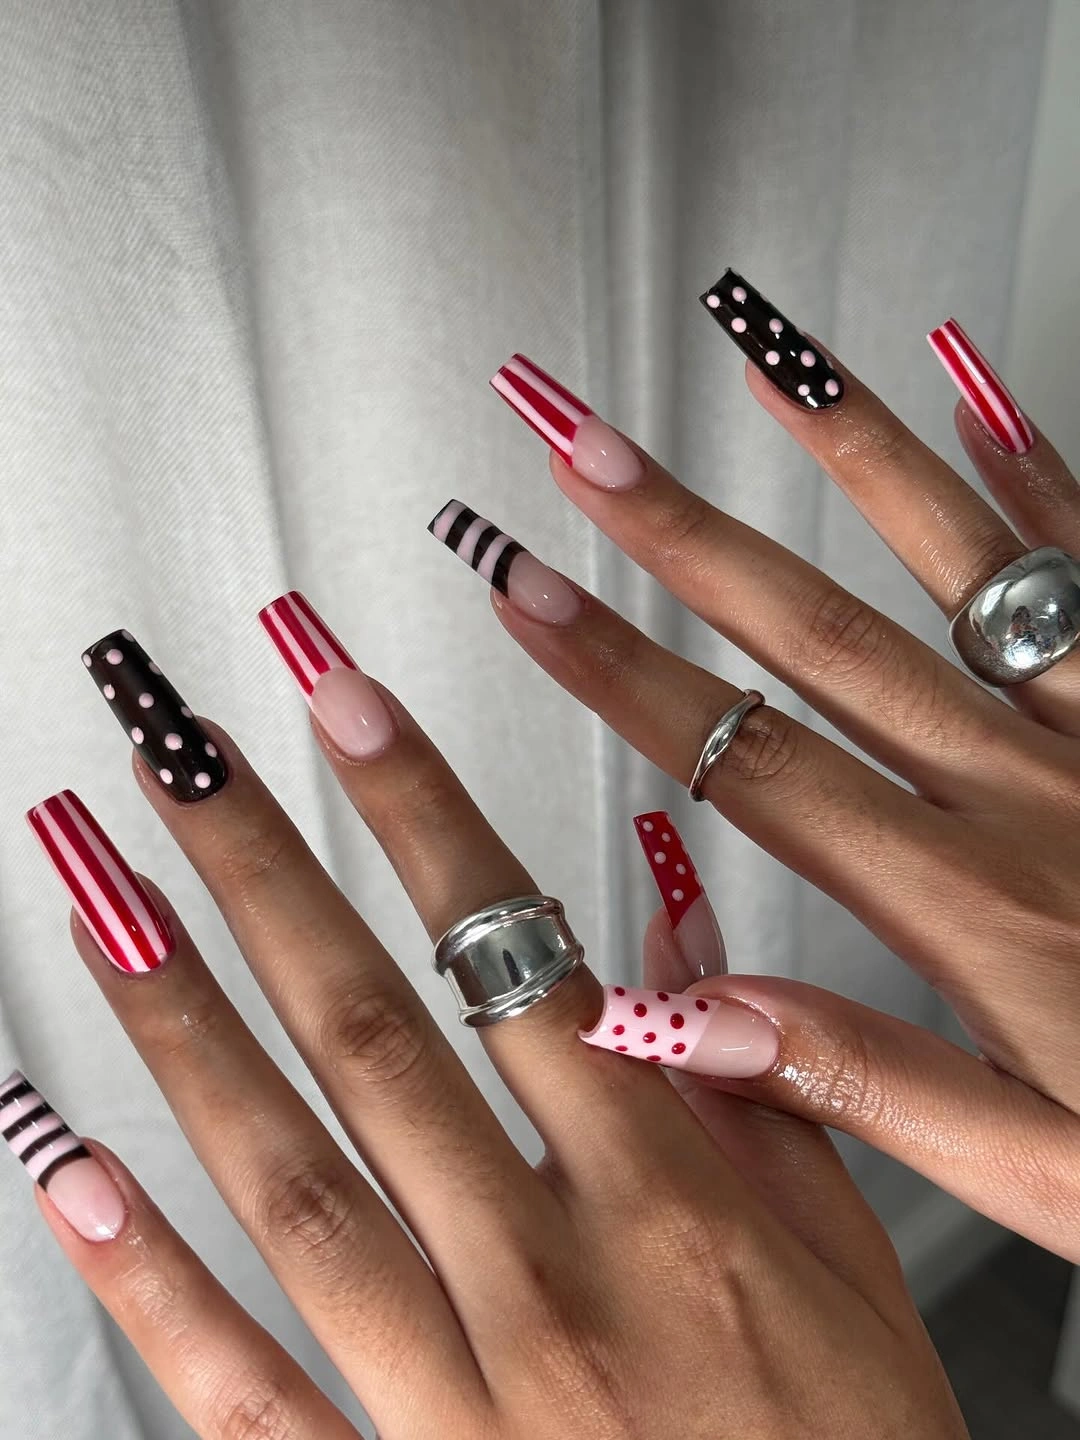
I would need a nude-pink base, cherry red, crisp white, black, and a soft pink polish, plus striping tape and two dotting tools. A thin liner brush would make the narrow stripes easier to control. I would definitely use a strong glossy top coat because several different finishes need to look like one manicure.
I would work nail by nail rather than trying to repeat one pattern across the whole hand. First I would establish the nude base, then add stripes or colored tips, and finally place the dots once the underlying designs are completely set. This is one manicure where planning the color balance before starting saves a lot of frustration.
I would wear this when I want my nails to be the accessory. It is bold, graphic, and a little nostalgic, but the clean execution keeps it firmly in modern nail-art territory.
Blue Outline Nails With Oversized Black Polka Dots
The final look takes polka dots somewhere much more graphic. The nails have a soft pink base outlined with an electric blue border, while large black dots and smaller black spots create an irregular pattern across each nail. The rounded shape keeps the strong colors from feeling too severe, and the glossy finish makes every detail pop.
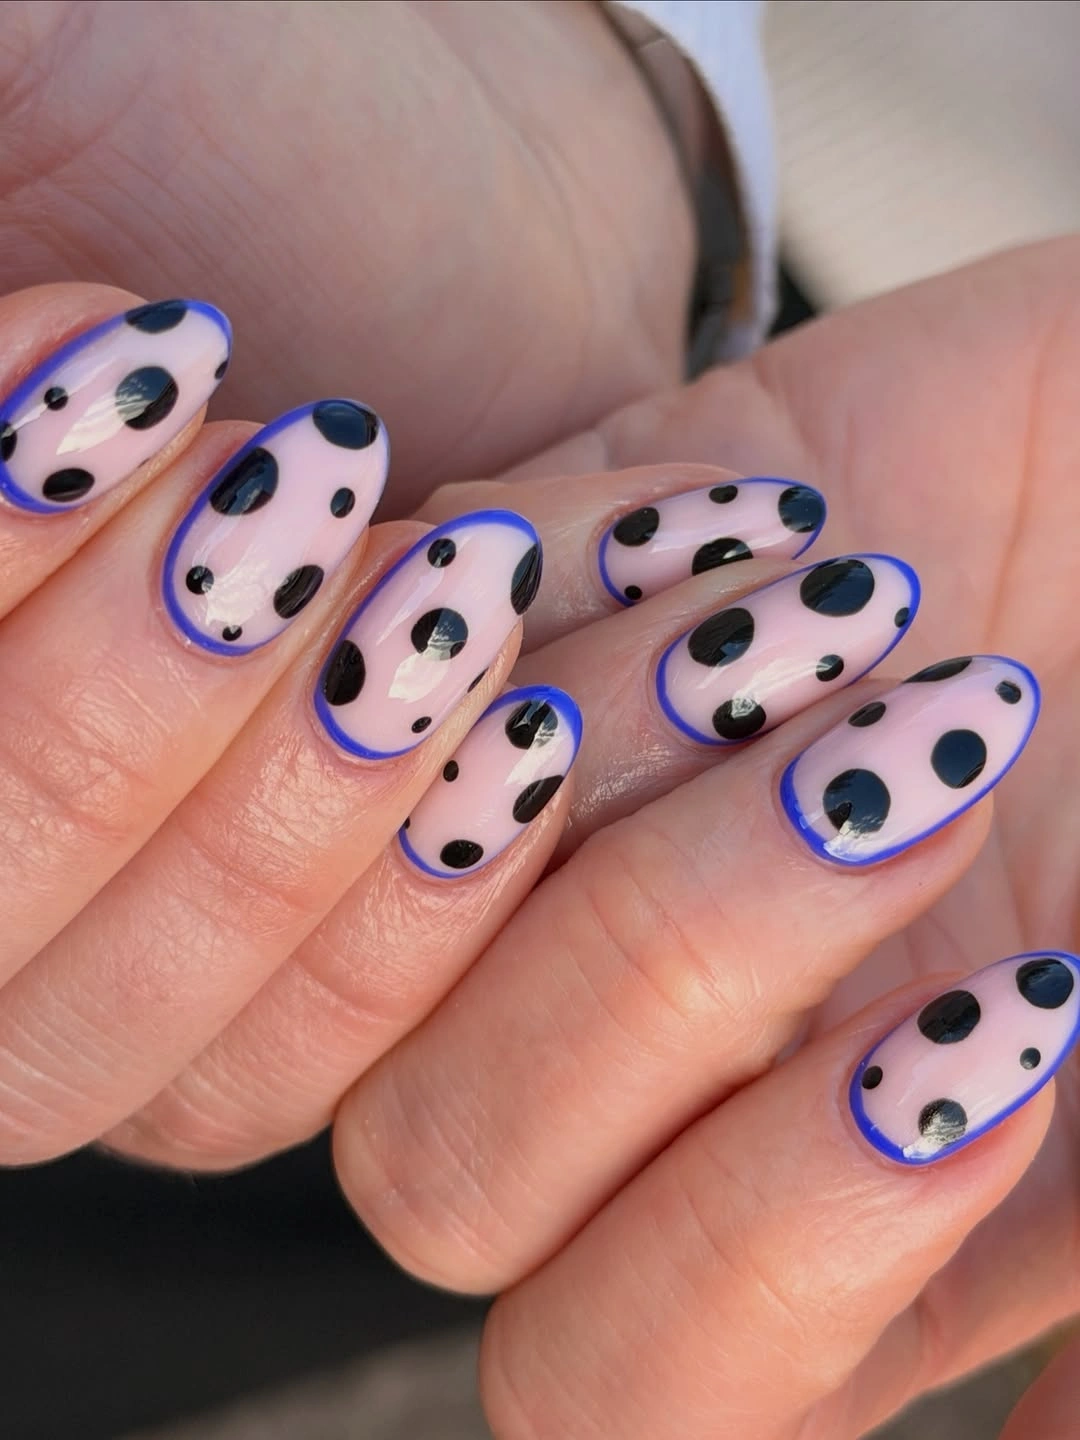
For this design, I would choose a sheer pink base, saturated cobalt-blue polish, and black polish in several levels of opacity if possible. A fine liner brush is useful for the blue outline, while a dotting tool handles the larger circles. I would finish with a high-shine top coat to emphasize the contrast.
I would apply the pink base first, then carefully trace the blue border around each nail. Once that is dry or cured, I would add the black dots in different sizes and positions. I would not try to make the nails identical – the irregular placement is part of the charm.
This one feels like a reminder that fall beauty does not have to stay inside a brown-and-burgundy box. I would pair it with denim, black, gray, or a simple cream knit and let the manicure bring the unexpected color. That little hit of blue might be exactly what the season needs.
Black Almond Nails With Delicate Silver Polka Dots
I love the drama of this black manicure for fall. Long almond nails are covered in glossy black polish, while tiny silver and pale blue dots create a scattered pattern across the surface. A few fine reflective lines add movement, so the design feels more like evening jewelry than ordinary nail art. It is dark, sleek, and just playful enough.
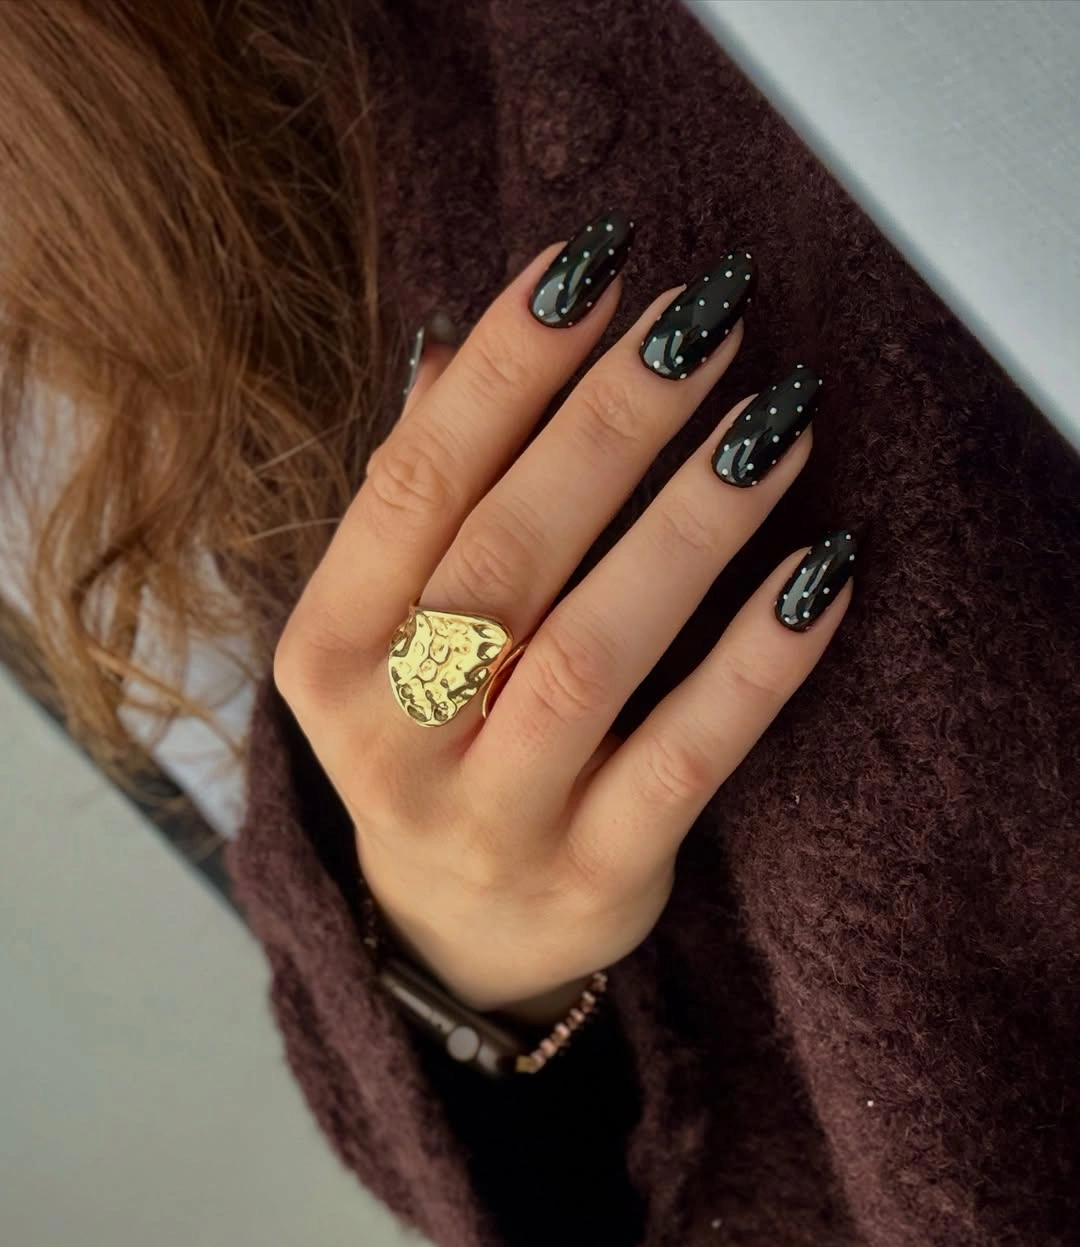
I would use a rich black gel polish, tiny silver or pale blue nail art dots, and a glossy top coat. For the cleanest result, I would apply two thin layers of black before adding the details with a fine dotting tool. I would keep the dots intentionally small so the dark base remains dominant.
For me, this is an easy choice for late fall. It looks gorgeous with chocolate-brown knits, black leather, burgundy coats, and gold jewelry. Sometimes a little sparkle against black is all the seasonal drama I need.
White Almond Polka Dot Nails With a Minimalist Finish
These long almond nails take polka dots back to their simplest form. The soft white base is covered with evenly spaced black dots, creating a clean graphic pattern that feels fresh rather than busy. The contrast is strong, but the limited palette makes the manicure surprisingly versatile. I could easily see it working with both casual fall layers and a more polished outfit.
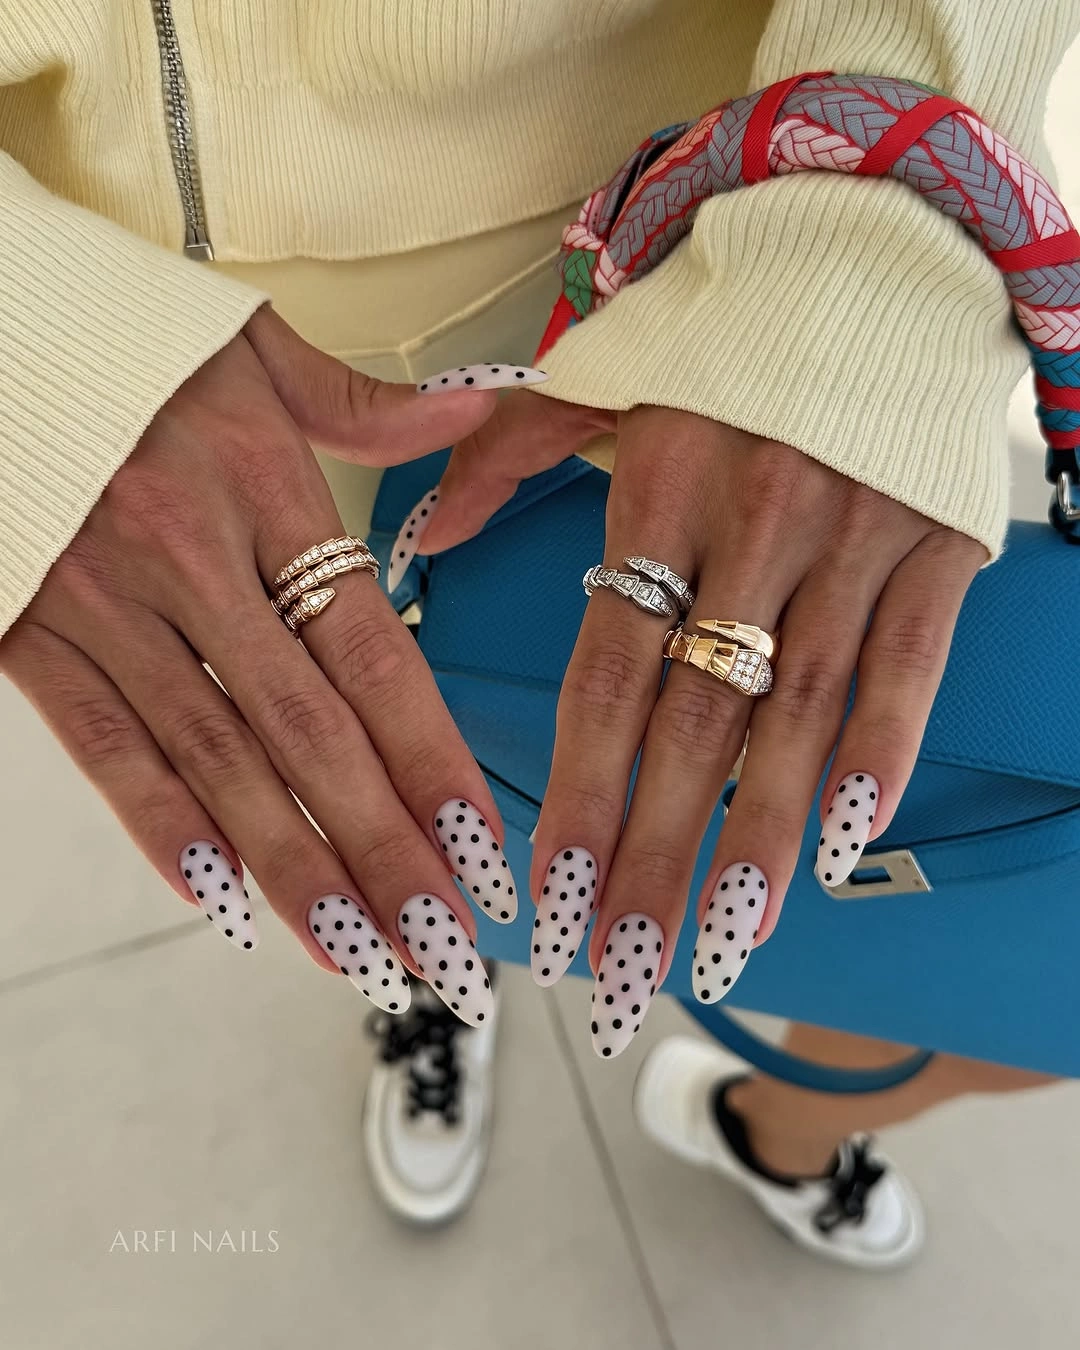
I would choose an opaque white polish, a deep black polish, and a medium dotting tool. After shaping the nails into a tapered almond, I would apply the white base in thin coats and let it cure fully before adding the dots. A glossy finish makes the black details look especially crisp.
This is probably the easiest design in this group to wear with everything. I would pair it with a cream sweater, dark denim, or even a checked blazer for fall. Clean, playful, done.
Pastel Pink Nails With Colorful Rhinestone Dots
If I want my fall manicure to feel cheerful rather than moody, this soft pink design immediately gets my attention. The almond nails have a pale pink base decorated with tiny multicolored rhinestones in red, green, blue, purple, gold, and silver. The embellishments resemble colorful polka dots, but their sparkle gives the manicure a more decorative finish.
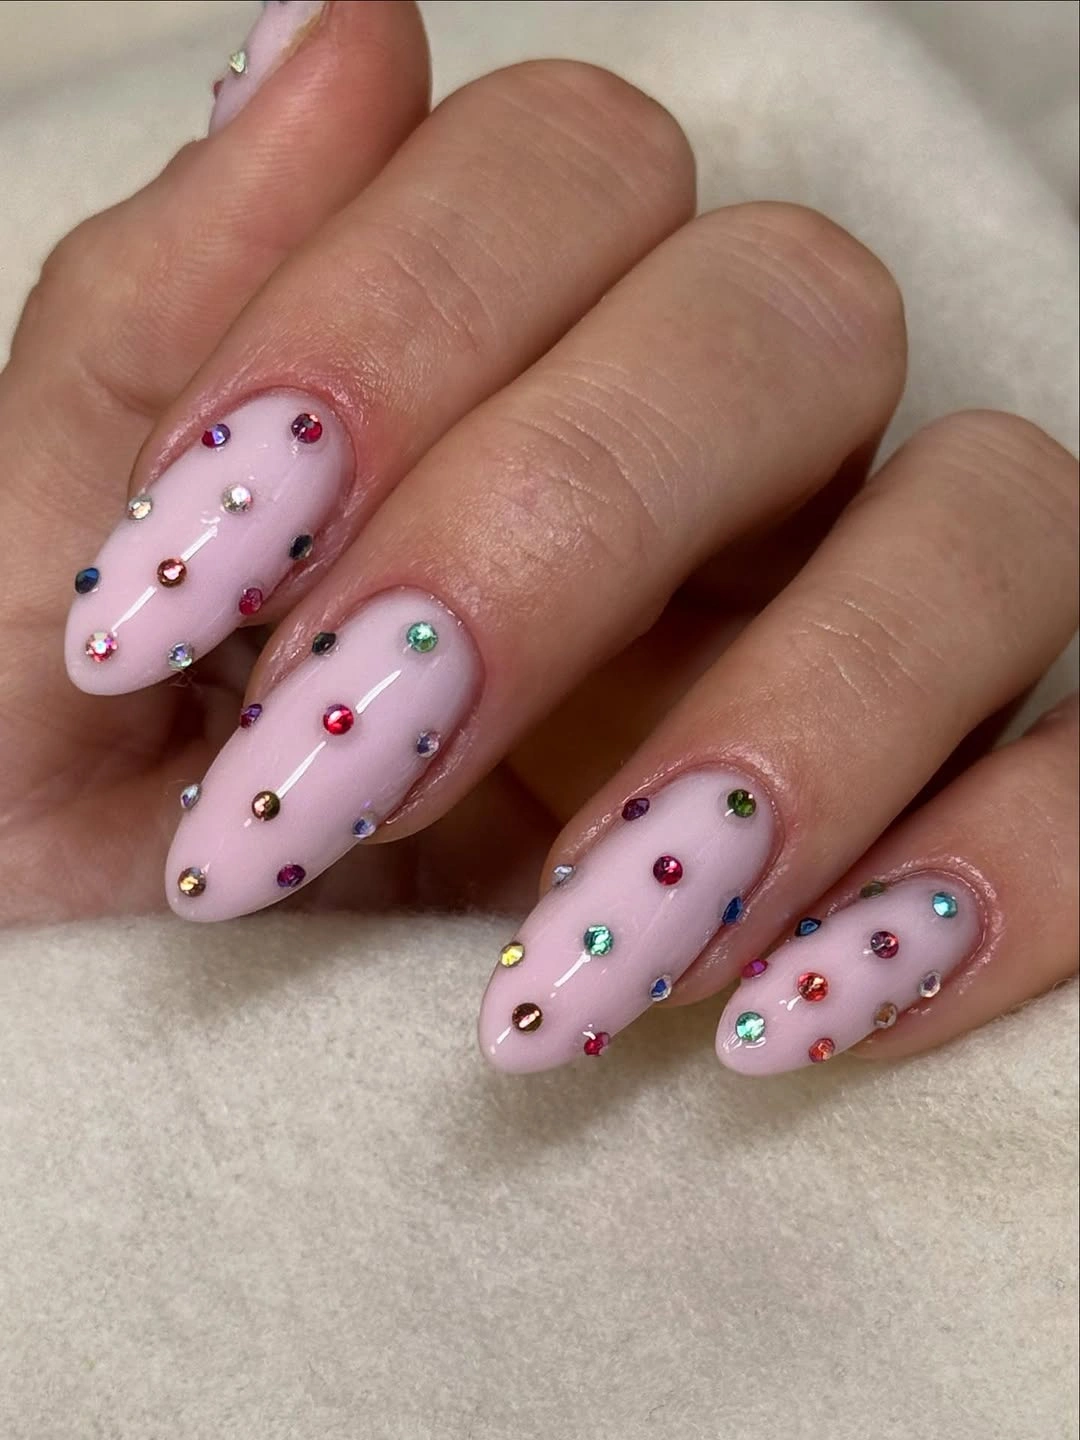
I would start with a milky pink gel polish and use small flat-back rhinestones in several jewel tones. Nail art adhesive or builder gel can help secure the embellishments, followed by careful top-coat application around the stones rather than directly over anything that needs to remain dimensional.
I like this idea for early fall when the light still feels relatively bright but the wardrobe is beginning to change. The jewel colors bring personality to a soft base, and the manicure would look especially pretty with simple gold rings.
Pastel Pink and Green Polka Dot Nails
This manicure gives polka dots a softer, almost candy-colored personality. The nails alternate between pale pink and muted pistachio green bases, with tiny pink or green dots scattered across each surface. The almond shape keeps the playful colors elegant, while the glossy finish makes the whole design look fresh and smooth.
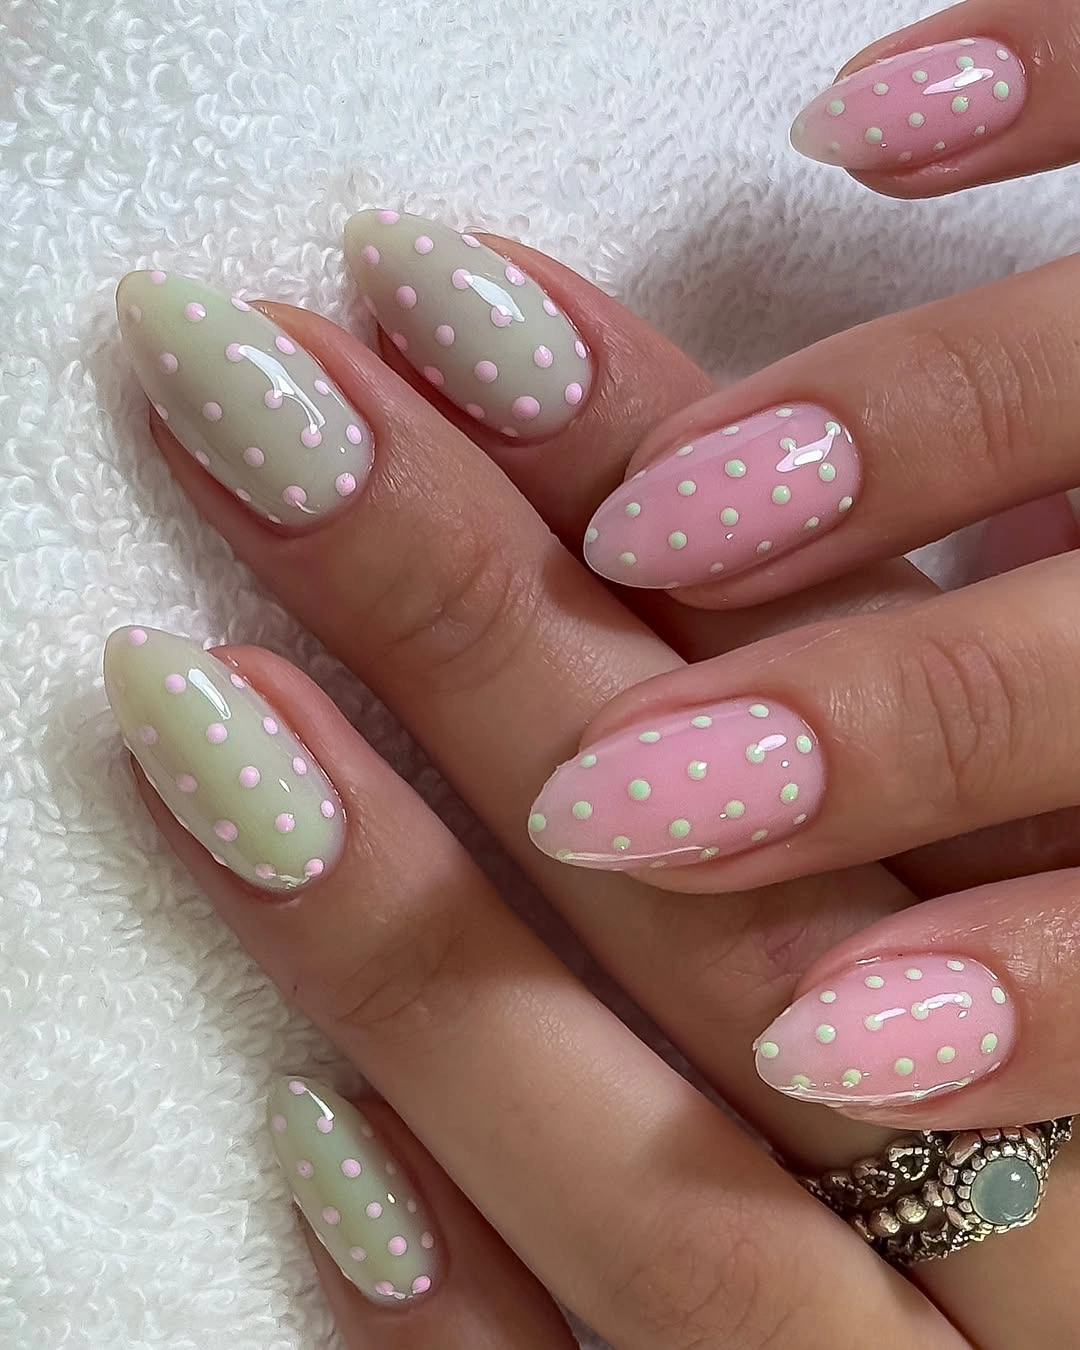
I would use pastel pink, soft sage or pistachio green, and a creamy contrasting shade for the dots. A small dotting tool is enough to recreate the pattern, and I would finish with a glossy top coat. The secret is keeping the colors muted so the manicure stays sophisticated.
I would choose this one for the softer side of fall. Think oversized cream knits, light denim, suede accessories, and delicate jewelry. It is proof that seasonal nails can still feel sweet without looking like summer leftovers.
Sheer French Polka Dot Nails With Black Lace Details
This final design is easily the most intricate of the group. Long pointed almond nails begin with a sheer nude-pink base and transition into delicate champagne-toned tips covered with tiny black dots. Fine black scalloped lines frame the French area, creating an almost lace-like effect. The result feels romantic, detailed, and beautifully old-fashioned in the best possible way.
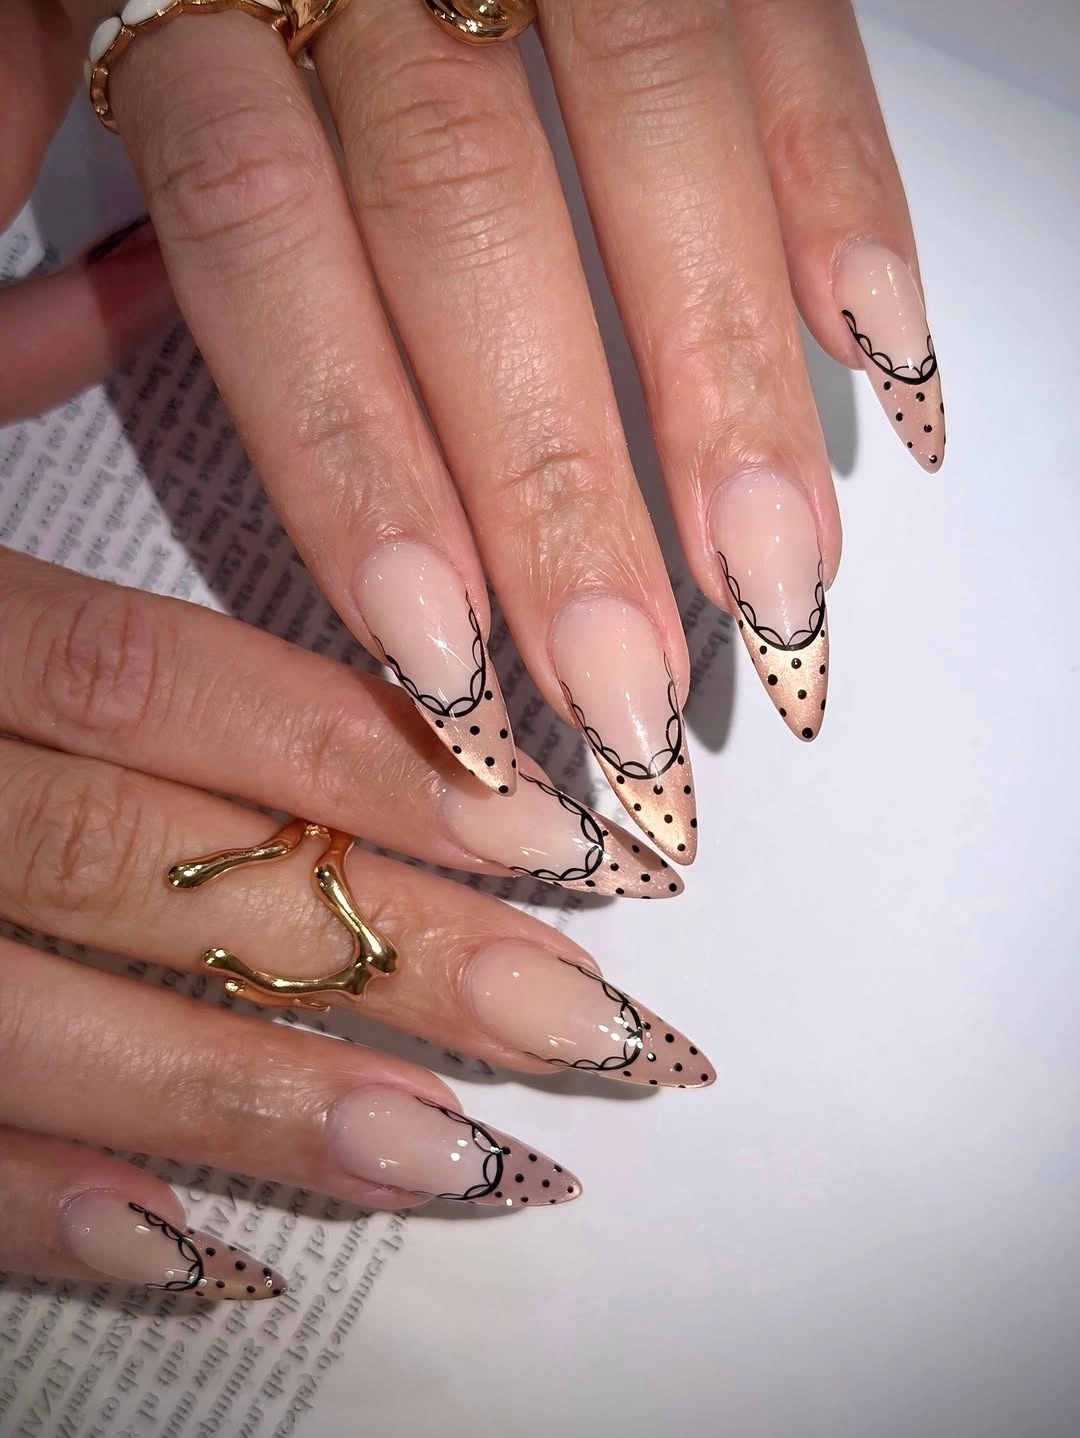
I would need a sheer nude base, a soft champagne polish, black gel paint, a very fine liner brush, and a dotting tool. I would create the French tips first, then carefully draw the scalloped lines before adding the small black dots. This is one I would personally leave to a nail artist if I wanted the lace detail perfectly crisp.
For fall, I find this version especially appealing with romantic styling – satin, lace, black knitwear, warm neutrals, and antique-looking gold jewelry. It takes the humble polka dot and gives it a sophisticated little plot twist.