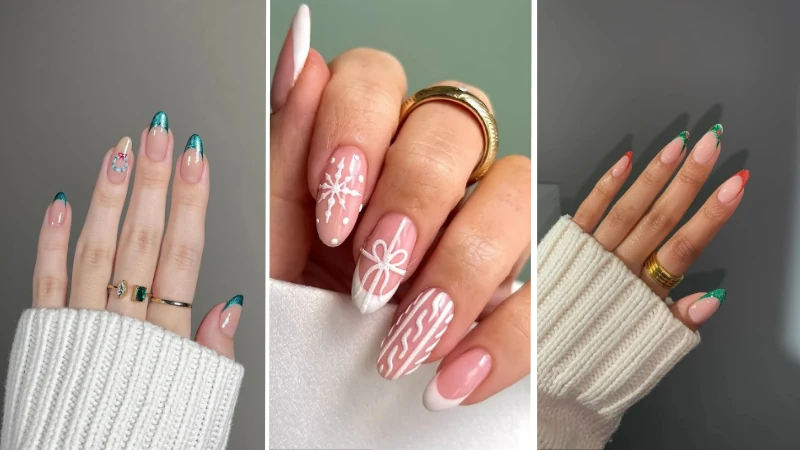
Winter French Tip Nails look easy on Pinterest, but the real test comes when you wear them through a week of icy gusts, dry office heat, and the constant tug of wool sleeves. Most inspiration boards skip the part about keeping that crisp white edge intact when your nails expand with moisture and contract in heated rooms. The prettiest holiday French tip nail art won’t survive if the formula stiffens instead of flexing. That’s the gap this list closes — with maintenance tricks that actually work between salon visits, not just in the photos.
For more ideas that hold up through the season, our roundup of winter nail designs and holiday manicures covers the same cold-weather challenges with practical upkeep built in.
21 Winter French Tip Nails for Every Cold-Weather Moment
From snowflake-studded tips to minimalist lines that survive hand cream, these 21 winter French designs keep your manicure looking crisp through the frostiest months.
The Holiday Red & Green Capsule
These designs lean into classic holiday colours — think deep crimson, pine green, gold glints, and the nostalgia of a wool plaid.
The Plaid & Gold Holiday French

by @disseynails
A nude base keeps the look grounded while alternating nails showcase deep crimson red, black, and gold plaid, alongside solid crimson French tips dusted with gold glitter. The glossy gel finish catches the light on every angle, and the almond shape elongates your fingers — a silhouette that feels festive without being costume-like. If you’re attempting plaid at home, paint your white striping lines first and let them dry fully before crossing with a second colour—wet lines bleed into each other and blur the check pattern. Pair with a simple gold ring and let the nails do the talking at every holiday dinner.
Emerald Tips with Cherry-Red Bows

A soft nude pink base sets the stage for crisp emerald green French tips — a shade that reads winter forest, not tropical. On two accent nails, tiny cherry-red bows are painted just above the green tip, the kind of detail that makes people lean in. The glossy gel finish deepens the jewel tones. When hand-painting your own bows, start with two simple loops and a tail; if you overcomplicate the shape, it reads as a blob from arm’s length. A gold bow-shaped ring on the same hand ties the whole look together without extra effort.
Red & Green Glitter Holiday French

Rather than one solid colour, this set mixes solid red and solid green glitter French tips across the hand — some nails wear scarlet sparkle, others a deep pine shimmer. A light nude base between the colours keeps the whole thing from looking busy. The almond medium length stays functional, and the glitter hides small regrowth better than cream finishes. To prevent colour bleed when curing gel glitter, keep the beads of red and green on separate nails entirely — don’t try to blend or overlap, or the line looks muddy under top coat. A gold multi-band ring ties the palette together, and the white sweater behind suggests this is a manicure built for family photos.
Ribbon & Candy Cane Silver Tips

A sheer pink base supports silver glitter French tips, with a couple of nails transforming into a holiday canvas: one features a hand-painted red ribbon curling across the centre, another shows delicate candy cane stripes. The mix of sparkle and line art keeps the set dynamic without feeling thrown together. The medium almond shape is tidy and classic. For crisp candy cane stripes, use striping tape — press it firmly at the edges; any gap lets polish seep underneath and ruins the clean line. The cream fuzzy sweater in the photo hints at hot chocolate stops, but the nails stand up on their own. This is a masterclass in balancing nostalgia with grown-up restraint.
Teal Glitter French & Wreath Accent

by @heajiheaji
A warm nude base gives way to glittering teal French tips — a colour that feels both frosty and rich. One accent nail holds a hand-painted wreath with a tiny red bow, painted with such precision it looks like it could be stamped but it’s not. The glossy finish locks in the glitter, and the medium almond length keeps the design wearable for actual life — if you’re constantly in and out of gloves, shorter shapes might be a smarter pick. Teal glitter can overwhelm a wreath design if the glitter extends too far down the nail; stop the glitter at the true smile line and keep the wreath on a separate sheer-base nail so it stays crisp. The gold rings in the photo echo the warmth of the nude base, and the white sweater sleeve makes the colours pop.
Cherry Red Tips & Subtle Red Swirl

Clean cherry red French tips sit on a soft nude base, and one accent nail adds a delicate red swirl just above the white line — a tiny flourish that whispers rather than shouts. The glossy gel finish gives the red a glass-like depth. The medium almond shape keeps the whole thing wearable, not costumey. To make a swirl accent nail work, keep the rest of the set plain — anything more than one accent distracts and cheapens the curve. A gold ring with a red heart-shaped stone echoes the colour story without overdoing it, and the beige ribbed sleeve in the background suggests a cosy afternoon by the fire. This is the kind of manicure that looks expensive but relies on just two colours.
Snow-Kissed Blues & Whites
Icy blues, silver glitters, and delicate snowflake nail art capture the quiet beauty of a snowy morning.
Ice Blue Ombré Snowflake French

by @heajiheaji
A sheer nude base transitions into a glittery sky blue ombré at the tip, like fresh snow under a pale winter sky. Delicate white snowflakes are hand-painted on one or two nails — each flake crisp and individual, no stickers here. The glossy top coat intensifies the shimmer, and the long almond shape keeps the hand looking graceful. For ombré without a sponge, apply the glitter-heavy polish only to the top third of the nail, then use a clean, flat brush to gently dab the line where the glitter meets the base — this softens the edge without muddying the sparkle. This set pairs perfectly with a cream turtleneck.
Cable-Knit & Snowflake Pink Tips

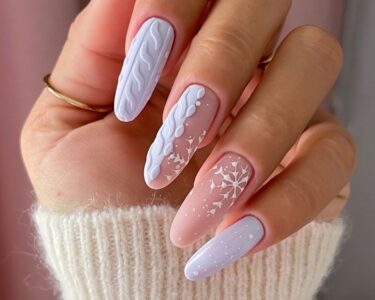
A soft pink base warms the overall look — think rosy cheeks in cold air. White French tips get a textural upgrade with one nail mimicking a cable-knit sweater, while another holds a tiny white snowflake and a delicate bow. The mix of finishes — smooth, raised texture, and fine line art — keeps the set interesting up close. To replicate the knit texture at home, use a fine dotting tool and a thick white gel paint; drag short lines in a diagonal V pattern — patience is more important than precision here. The almond shape softens the whole hand, and a gold ring adds a quiet glow.
Pink Glitter French & Snowflake Accent

Bubblegum pink glitter concentrates at the tips, over a sheer nude base, making the smile line feel softer than a hard white strip. One accent nail has a miniature white snowflake painted dead centre — the kind of detail that stops people mid-sentence. The glossy finish enhances the sparkle, and the almond shape keeps the overall look from veering too sweet. Glitter polish at the tip can weigh down the nail visually; to balance it, keep the base sheer enough that your natural moon shows through — this creates lightness at the bottom. Pair with a chunky cream knit and silver jewellery for an afternoon shopping look.
Raised Snowflake Baby Blue French

by @thehotblend
A few nails stick to a clean baby blue French tip on a nude base, while the rest shift to a full baby blue coat with textured white snowflake patterns raised off the surface. The texture is the star — you feel it when you run a fingertip over. The almond shape keeps the hand feminine, and the pale palette feels fresh rather than frosty. If you’re creating 3D snowflakes with builder gel, work one petal at a time and flash-cure for five seconds before adding the next — otherwise gravity drags the gel into a puddle. The gold rings in the photo prove that blue and gold belong together in winter.
Icy Blue Sparkle Snowflake Almond

A sheer pale nude base almost disappears, leaving icy blue glitter concentrated at the tips like frozen water. White snowflakes float on alternating nails, creating a crisp, clean winter look that feels more spa than kindergarten holiday party. The glossy top coat amplifies the icy effect. To keep snowflake art sharp on a glitter background, paint the snowflake in pure white gel and cure it before applying top coat — otherwise the glitter grains drag into the white and turn it grey. The medium almond shape keeps the nails wearable for gift wrapping and typing, and the light blue sleeve in the photo reinforces the cool palette.
Forest Glitter Tips & Mini Snowflakes

A sheer light pink base keeps things soft, while the tips burst into forest green glitter — the shade of real pine needles. Tiny white snowflakes are painted on two accent nails, adding that just-enough-festive detail without overwhelming the glitter. The glossy finish reflects light well, and the almond shape keeps the look elongated. Forest green glitter can lose its depth under dim indoor lighting; pick a glitter polish with a dark green jelly base rather than a clear base — the colour stays true even at candlelit dinners. Pair this set with a chunky sage green knit for a tonal winter outfit that photographs perfectly.
Pink Glitter Coffin Tips & Snowflakes

Coffin-shaped nails get a high-energy holiday treatment: some fingers are solid pink glitter, others feature bubblegum pink French tips with white snowflakes and tiny dots. The contrast between the fully glittered nail and the more open design creates visual rhythm — like a well-planned holiday playlist. The glossy finish maxes out the sparkle factor. Coffin shapes need a strong free edge to hold that straight tip; if you’re growing out your natural nails, reinforce the corners with a thin layer of builder gel — they’re the first place cracks start. This set works well with a denim sleeve, proving it transitions easily from casual to dressed-up.
For the Workweek
When your calendar stretches from boardroom to barre class, these low-key French tips stay polished without screaming ‚manicure‘.
Muted Blue Tips & White Sunburst

by @lillypalm__
A square medium shape gives these pale blue French tips a practical, modern feel — the corners are soft enough to resist snagging but structured for typing. The accent nail features a tiny white sunburst radiating from the cuticle corner, a detail that feels like sunshine on a cold day. The glossy finish keeps the overall look fresh and clean without being stark. If you have naturally square nail beds, resist filing the sidewalls too thin — a little width prevents snapping when you pull on wool coats. This is the kind of manicure that slides seamlessly from Tuesday meeting to Saturday brunch, and if you prefer January nails that feel fresh rather than festive, start here.
Matte Burgundy with Mercury Wave

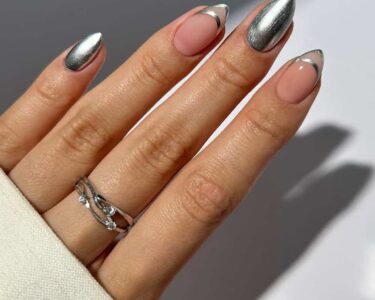
A deep burgundy base covers the entire nail on this set, and instead of a classic white tip, a thin curved line of silver glitter arches near the free edge — a sort of negative-space French tip that reads both moody and festive. The matte finish knocks down the shininess, letting the glitter catch the light like a single ribbon. A matte top coat shows oil and lotion marks quickly; wipe nails with an alcohol pad before heading out to keep the finish looking even and unfingered. The long almond shape stretches the finger, and the overall effect is grown-up glamour without red glitter everywhere.
Bright Blue Ombré Everyday French

This isn’t a traditional painted tip — it’s a full-nail ombré that transitions from an iridescent white near the cuticle to a vibrant sky blue at the free edge. The shimmer finish catches daylight in a way that feels cheerful, not loud. Long almond nails amplify the colour movement. To maintain a crisp ombré line at the free edge, wipe your brush before each swipe near the tip — built-up product will leave a darker ridge that ruins the blended effect. This is a brilliant choice if you want a winter manicure that doesn’t rely on snowflakes or berries and still feels seasonal. The hand in the photo wears three gold rings, but the nails hold their own.
Black Gold Line Art Almond Tips

This set swaps stark white for a deep black French tip — sharp and modern. A few nails feature swirling black and gold line art over a sheer nude base, as if painted with a single confident brushstroke. The combination reads clean-girl aesthetic with a slightly rebellious edge. The long almond shape stretches the finger, making the dark tips look even more deliberate. When creating fine line art at home, dip your brush in alcohol first, then mix with gel paint — it thins the consistency just enough to glide without dragging or skipping. This manicure works for a gallery opening or a Tuesday boardroom, and it fades out with regrowth far more gracefully than you’d expect.
The Evening Sparkle Collection
For the office party, New Year’s Eve nails, or any night that calls for a little extra — charms, pearls, and celestial touches take centre stage.
Black Glitter Tips & Snowflake Edge

by @thehotblend
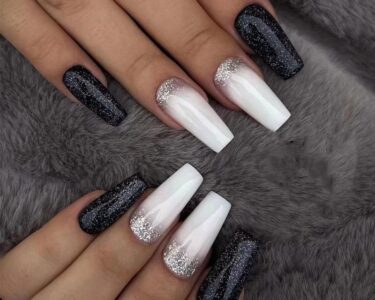
A nude base with some nails completely washed in black glitter gives this set an unexpected winter goth twist. One nail keeps a sheer nude bed with a single black snowflake motif — crisp and striking against the pale backdrop. The contrast of dense black sparkle and delicate negative space works because the overall shape stays almond and elongated. Black glitter polish can look muddy if the base pigment isn’t saturated; apply a layer of plain black crème underneath the glitter so the sparkle has depth, not a sheer patchy look. This design holds its own against a black fabric sleeve.



e.l.f. Halo Glow Liquid Filter
A glow-enhancing complexion booster for soft-focus makeup looks.
Check Price on AmazonAs an Amazon Associate, Lady Lana Beauty earns from qualifying purchases.
Silver Glitter Tips & Star Charms

A classic French white tip gets a sprinkling of silver glitter beneath, so the white appears to float on a bed of sparkle. One accent nail takes it further with small star and teardrop-shaped silver charms, adding a lightweight 3D element that catches but doesn’t overwhelm. The almond medium length is practical enough for opening a clutch, yet festive enough for a cocktail hour. When applying charms with nail glue, place a tiny dot and press for ten seconds — excess glue will ooze out and cure cloudy, wrecking the whole clean look. The sheer nude base lets the glitter and charms do the heavy lifting.
Royal Blue Pearled French Tips

by @thehotblend
A sheer nude base pairs with a bold royal blue French tip — the kind of blue that looks expensive. Across several nails, small white pearls are scattered like they just rolled off a necklace, creating a 3D surface that catches light and conversation. The long almond shape provides the perfect canvas. Pearls on nails need a bed of clear gel to sit in; simply gluing them onto a finished surface guarantees they’ll pop off in a glove or a handbag by day two. Keep the rest of your jewellery simple — the nails are the main event. This is the manicure equivalent of a velvet gown.
Gold Celestial French & Starry Tips

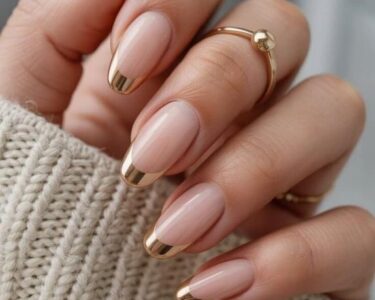
A pale pink base transitions into a metallic gold French tip, as if someone dipped the nail in liquid starlight. Tiny white star accents and scattered glitter particles complete the celestial theme. The glossy finish pushes the gold to mirror-like brilliance. Metallic gold polish can look harsh against pale skin if applied too thick; use a sheer coat first, let it dry, then add a second thin layer — the depth builds without turning brassy. The almond medium shape is refined and party-appropriate, especially with a thin textured gold ring. This set feels New Year’s Eve-ready but works all winter long.
The Top Coat Trick That Keeps Winter French Tip Nails Pristine
Flexible top coat, not hard gloss: A stiff, glassy top coat shatters when your nails flex in the cold. You need a soak-off gel-effect formula that moves with the plate. Look for “flexible” or “gel finish” on the bottle. Drugstore brands now carry these, and they stop the white tips from crazing like old porcelain after a day in mittens.
Reseal the tips every 48 hours: Moisture creeps under the white line from hand washing, snow, and the hand cream you apply ten times a day. A quick swipe of top coat across just the free edge re-seals that micro gap. It’s the single fastest way to turn a five-day manicure into ten.
Skip quick-dry drops near radiators: Rushing from icy air into a heated building floods the polish with tiny bubbles that later turn into chips. Let the top coat air-set for five minutes before you go near a heater. A daylight LED desk lamp gives a gentle set without the thermal shock.
Store a mini bottle in your car console: Extreme cold in a parked car doesn’t ruin the formula as fast as body heat from your handbag. A 5ml bottle lives in the cup holder and saves a ruined tip after scraping ice off the windscreen. This kind of prevention keeps winter nails looking deliberate rather than defeated.
Revive dull white with a water-based brightener: When the tip goes fuzzy mid-week, a single stroke of tip brightener (the kind sold for acrylics) pulls it back to crisp white without a full redo. It dries matte, so layer your flexible top coat over it and you have another three days.
The Drugstore DIY Dupe for a Salon-Quality Winter Manicure
Ditch the French kit’s white polish: Those skinny striper brushes leave streaks and look painted, not grown. Instead, pick a standalone off-white with a paddle brush — “linen” or “snow” shades, never pure optic white. A blurred edge reads as natural, even when it isn’t perfect. Pair it with a sheer milky pink base to mimic the depth of a professional overlay.
Start with a sticky, rubberised base coat: Ridge fillers are too rigid. A rubber base grips the colour layer through temperature swings, keeping the white from lifting at the sides. This one swap probably fixes half the winter chips I see in the wild.
Cool your nails before painting the tip: Rest your hand on a towel-wrapped ice pack for thirty seconds. Cool plates make the white polish flow slower and level better — fewer streaks, less rework. The conventional take is to paint at room temperature, but I’d argue that trick misses how polish behaves on a warm nail bed.
Cure each layer under a daylight LED lamp: Even traditional lacquer stays slightly gummy in dry indoor heat. Ninety seconds under a desk lamp with a daylight bulb hardens the surface enough to handle a key search in a handbag or pulling on a wool jumper. It’s the poor woman’s UV lamp, and it works.
Cap the free edge properly: Drag the white and the top coat across the front of the nail tip. Most home manicures skip this, but it’s the seal that stops water pushing the polish off from underneath. Salons do it every time; now you do too. If you’re building short winter nails, capping takes three extra seconds and doubles the wear.
Why Your Manicure Chips Faster When Temperatures Drop
Expansion and contraction: Nails soak up moisture from wet glove linings and thick hand creams, then shrink in dry indoor heat. This cycle can lift polish within twelve hours. A thin layer of cuticle oil worked into the bare nail before base coat reduces water absorption — yes, oil before anything else. Most guides say to start with a dry, dehydrated plate; I’d argue that advice only works in mild weather. In cold, it makes nails brittle and polish starved for grip.
Urea-based hand lotions eat lacquer: Urea is brilliant for cracked winter skin, but it softens the top layer of polish. Wait a full twenty minutes after you moisturise before you cap the tips or do a touch-up. Otherwise you are basically applying remover in slow motion.
Shower steam hides in the gap: Hot vapour penetrates the microscopic join between the white and the pink. After a long bath, rinse just your fingertips under cold water for ten seconds. It shocks the gap closed again. Silly little habit, huge difference for winter nail designs with crisp French lines.
Alkaline hand wash strips adhesion: The pink soaps in public loos and office kitchens are often alkaline, and they dull shine and weaken the bond within three days. Carry a pH-balanced, sulfate-free mini hand wash. It feels fussy, but so does explaining to colleagues why only your thumb still has a tip.
The 5-Second Salon Request That Extends Your French Tips
Request a pinched apex for structural strength: Ask your tech to press the sides of the enhancement while it’s still malleable to create a deeper C-curve. On almond and oval shapes, this arch resists the tapping-on-desk stress that makes the white line blur into the nail bed. For square and squoval, the pinched apex stops the free edge from flexing unduly, which is especially useful if you type a lot. Stiletto and coffin shapes already have a peaked back, but a reinforced C-curve keeps them from looking flat after a week in thick tights and snow boots.
Insist on a full-well white application: The white should start just behind your natural smile line, not right at the edge. As your nail grows, this softer origin means the regrowth looks intentional rather than sloppy. On short nail beds or square shapes, a full-well placement also prevents the illusion of a stunted nail — the eye reads length where the white begins. For winter almond French nails, it elongates the hand even further, a trick you want when gloves squash the silhouette.
Demand flexible soak-off builder, not hard gel: Hard gel snaps when nails flex during snow shovelling or wrestling on thick tights. A soak-off builder bends with the plate, and if a corner lifts, it can be mended without a full removal. The same logic applies to any gel winter French tip nails: rigidity is the enemy in cold weather.
Capped sidewalls, not just the tip: The nail edges rub against glove linings and coat pockets all day, so ask the technician to seal the colour along the sidewalls too. It takes five extra seconds and is the strongest predictor of whether your white line stays crisp past day seven. A technician who ignores this request is the one whose set you pick at by Friday.
Your Winter Nail Survival Kit Checklist
A slim tin of daily mends: Pack a mini flexible top coat, a few alcohol wipes, a tiny buffing block for snags, and a white polish pen you can use without a mirror.
This lives in your work bag, not the bathroom drawer. I’d rather touch up a scruffy tip on the go than accept a chipped look—maintenance, not the initial artistry, makes a French manicure look expensive. The pen hides regrowth better than a full redo and dries matte enough that no one notices under office lights.
An occlusive night balm, not cuticle oil: Swap your usual oil for a balm with lanolin or shea and apply it only after the heating has stabilised for the night.
Oil soaks in too fast and can make tips slippery right before you pull on a wool coat. A thicker balm locks moisture into the nail plate without softening the top coat. This is especially critical if you wear gel winter French tip nails—the rigid overlay needs a pliable natural nail underneath, otherwise every tiny flex causes a crack you can’t buff away.
Fingertip-less silk or cotton gloves: Slip these on when you drive, rummage through a heavy bag, or walk the dog in deep freeze.
The tapered point of winter almond French nails is a magnet for sweater pulls and zipper teeth. A fine glove layer acts like a smooth shield and won’t smudge a fresh top coat. I keep a pair in my coat pocket from November onward, and my tips last five days longer before I need a real repair.
UV-protective nail strips: If your French tips are gel, stash a sheet of SPF 30 nail film or a couple of precut strips in the kit.
Snow glare nearly doubles UV exposure, and even twenty minutes of winter sun can yellow a clear overlay on gel winter French tip nails. Stick a strip on each nail before a long walk or a ski weekend—the film is invisible and peels off without leaving glue behind.
A fresh, flexible base coat: Check the viscosity of your go-to base every few weeks; dry indoor air thickens it faster than you expect.
Store the bottle upright in a cool drawer, far from the steamy bathroom. A thin, tacky base grips the natural nail through temperature swings, while a stringy one peels in sheets. If yours has turned gluey, start with a new one—the whole routine is only as strong as that first layer, and a winter nail routine that skips this never quite holds.
FAQ
Can I do French tips if my natural nails are short and square?
Short nails actually hold the white tip line better because there’s less leverage for cracks. Use a sheer milky pink base to add visual length, and paint the white strip thinner than you think you need—on short beds a thick white band makes the nail look stubby. I keep returning to the short nail techniques that hide regrowth because a carefully placed smile line does more for elegant proportions than length ever will.
Will a gel French manicure ruin my already thin, bendy winter nails?
Only if the removal is rough. Ask your tech for a flexible soak-off gel, never a hard gel—hard gel stays rigid while your natural nail bends, and that mismatch causes painful cracks. At home, soak cotton pads with acetone that contains a drop of glycerin, wrap tightly with foil, and slide your hands into disposable warming mittens for ten minutes; the gentle heat lets everything slide off without scraping.
How do I fix a smudged white tip without starting over?
Dab, don’t wipe. Dip a fine liner brush into non-acetone remover and trace only the smudged edge to redefine the smile line. Then pat a dot of white polish on the blurred spot with a dotting tool and immediately dip the whole tip in a fast-setting top coat to melt the layers together—the fix becomes invisible in seconds.
Why do my French tips look yellow or dull only in winter?
Heat from fireplaces, car vents, and oven doors triggers the nitrocellulose in white polish to shift warm. Switch to a blue-tinted top coat labelled “violet corrector”—it neutralises the yellow cast without altering the whiteness you want. Apply it over the white tip every 48 hours and you’ll hold a crisp line through February.
Is it okay to get a full French set right before a warm-weather vacation during winter?
Yes, but time it three days before you leave. Acrylics and gels need those days to fully settle into your home environment; if you fly to humidity the morning after a fresh set, the sudden moisture causes lifting at the edges. The three-day window lets the product adjust to your nail plate so the tropical shift doesn’t ruin your holiday manicure on day two.
What’s the fastest way to remove Winter French Tip Nails without damaging my nail bed?
Soak cotton balls in pure acetone, place one on each nail, wrap with foil, and then tuck both hands into disposable warming mittens for ten minutes. The gentle heat speeds removal exponentially, and because you aren’t scraping or pushing, the nail bed stays intact. The warm mittens also keep cuticles from drying out—a real bonus when the air is already pulling moisture from every part of you.
Do pointed or almond French tips make short fingers look even shorter in winter gloves?
It’s the opposite. Almond and oval shapes with a thin white line pull the eye outward, making fingers appear longer even inside a glove. Square tips create a blunt visual stop that can shorten the line. Round and squoval sit in the middle and are the most practical if you type all day, though they need a careful white strip to keep the elongation. The real trick is keeping the white line slim—short nail beds demand an especially precise smile line.