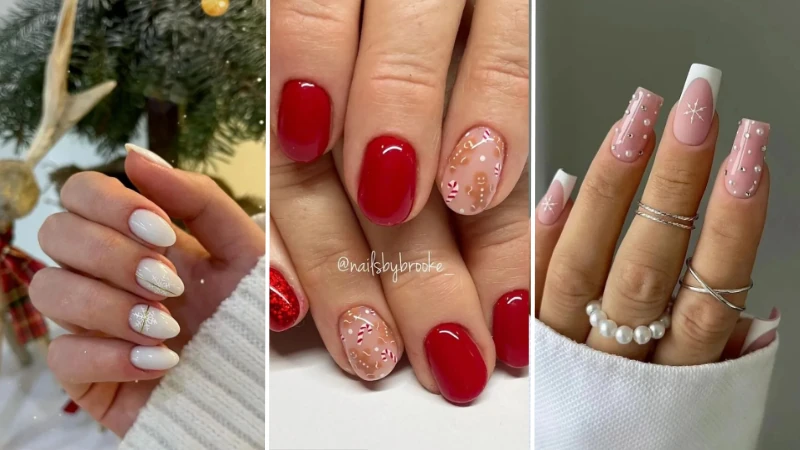
That Christmas manicure you pinned looks flawless in the photo. The prettiest Holiday Nails on social media rarely show the aftermath of present wrapping, travel, and kitchen prep. They don’t show the edge wear, the glitter that won’t shift, or the base coat that lifts on day four. That disconnect is exactly why so many festive manicures end up disappointing before the main event even starts, leaving you with a colour that looks tired instead of celebratory. A well-chosen Christmas Nail Art design should survive the season, not just the party.
Building a holiday manicure that lasts starts with the right foundation. If your polish chips by day three, the base coat matters more than the colour—start with a Christmas nails collection. And for patterns that hide minor tip wear, Winter Nail Designs offer plenty of grow-out-friendly options.
36 Holiday Nails That Actually Last
From hand-painted characters to glittering French tips, these 36 looks come with the small, specific advice that makes them survive cooking, wrapping, and one too many hand-washes.
Classic Christmas
Traditional reds, deep greens, and festive motifs that never feel tired — because sometimes you just want a manicure that looks unmistakably like December.
Hand-Painted Holly with Gold Leaf

A sheer nude base keeps this oval medium set soft, while one accent nail gets a full coat of gold glitter and another a dark forest green French tip. The ring finger carries hand‑painted holly leaves and bright red berries, glossy as glass. Lightly buff the free edge after colour but before top coat — it removes the microscopic lip that catches on gift wrap and triggers early chipping. The green tip hides outgrowth for a few extra days, making this one of the more practical festive mixes you can wear to every party without a constant touch‑up.
Retro Waves and Candy-Colour Tips

Almond long nails turn into a nostalgic holiday scene with olive green, bubblegum pink, cherry red, and mint green. French tips sit next to wavy abstract lines and tiny star motifs, all sealed under a high‑gloss gel. The mix of patterns gives the hand a lively, almost 1970s Christmas‑card feel. When you layer this many colours, apply the lightest shade first — it stops darker polish bleeding into the nudier base and keeps the lines crisp. The shape elongates the fingers, but the busy art means you can go a full week without anyone noticing a small chip.
Holly Accent on Long Squares

Long square nails in a sheer pale pink base are decorated with delicate hand‑painted holly sprigs: tiny forest green leaves and bright red berry dots. The glossy gel finish gives the pale pink a glass‑like depth. Square tips lose corners first; round them very slightly with a fine file to reduce catch‑point pressure on the free edge — the shape still reads as square while lasting longer. This design reads ‘quietly festive’ and works well for women who want a hint of Christmas without a full‑colour commitment.
Mistletoe Accents on Oval Nudes

by @learnahstarbuck_nailartist
Oval medium nails keep a nude base and add emerald green mistletoe leaves with crimson red dots on two accent nails. The botanical hand‑painting is precise, almost like a pressed‑flower specimen. If your brush strokes wobble, steady your painting hand by resting the side of your palm on the table — it removes the micro‑tremors that make leaves look lopsided. The glossy top coat seals the art and adds a plump, professional look that hides any minor imperfections underneath.
Miniature Evergreens on Short Squoval

Short squoval nails alternate solid forest green with nude nails that feature tiny hand‑painted Christmas trees in green, gold, and red. Gold glitter accents add sparkle without bulk. On short nails, keep the tree design no taller than a third of the nail length — any larger and it overwhelms the bed, making the nail look stubby. The compact proportions make this set feel considered and grown‑up, perfect for someone who types all day and needs a low‑profile holiday look.
Hand-Painted Ornaments and Joy

Oval short nails pair solid forest green with a sheer nude base that holds miniature white snowflakes, a golden gift box, and the word ‘joy’ in fine script. The hand‑painted ornaments look like tiny decorations you could pluck off the nail. When painting words, use a watered‑down acrylic paint instead of gel for finer control — gel can be too thick and spread before curing. The mix of motifs and the clean white negative space keeps the design from feeling busy, even on shorter lengths.
Christmas Pudding with Gold Foil

by @belle_voir
Almond medium nails blend deep forest green, nude, and a tortoise‑shell pattern with gold foil on the thumb. The accent nail features a detailed Christmas pudding with white icing and red holly. Tortoise shell over green is an unexpected pairing, and gold foil adheres best when pressed into a tacky gel layer — never try to apply it over a dry top coat or it will flake off within hours. This design is rich and layered, offering something different from the typical red‑and‑green palette while still reading as festive.
Gold Glitter Tree on Dusty Rose

Square medium nails in dusty rose and forest green frame an accent nail with a hand‑painted gold glitter Christmas tree. The tree is outlined in fine gold line work and filled with dense gold sparkle. When using loose glitter for a design like this, mix it with a small amount of clear gel on a palette first — applying it dry scatters glitter everywhere and wastes product. The dusty rose base softens the whole look, making it feel warm and wintery rather than shouty.
Character Charms
Gingerbread men, reindeer, and tiny Santas bring the fun — these designs prove that nail art can be cute without being childish.
Reindeer Silhouettes in Chocolate and Bronze

Almond medium nails mix chocolate brown, bronze glitter, and nude with hand‑painted reindeer motifs. I prefer a deep brown over standard red any day — it looks richer against winter knits. The palette is warm and cosy, avoiding the typical bright red. When using gel, under‑curing deep colours leads to wrinkles within a day — always cure for the full recommended time, even if the lamp feels warm enough after twenty seconds. The reindeer is painted in fine lines, so it reads like a little sketch rather than a cartoon.
Candy Cane Hearts on Baby Pink

Almond medium nails in bubblegum pink have candy cane stripes on some tips, a tiny heart on another, and a miniature red heart at the tip of the little finger. The look is sweet and approachable. Use a dotting tool for the heart instead of a brush — it creates a perfect, crisp shape without flooding the cuticle. This is a design you can recreate at home with a steady hand and a single red polish, making it a favourite for last‑minute holiday plans.
Tiny Stockings on Nude Almonds

Almond medium nails in a pale pink base get a string‑art line and miniature stocking decals, plus a tiny snowman and holly. The decals bring the detail you could never hand‑paint in five minutes. Press decals onto the nail while the base coat is still tacky — if the surface is too wet or too dry, the edges lift within hours. The overall effect is whimsical but clean, thanks to the neutral background.
Gold Antler Line Art over Ruby Glitter

by @belle_voir
Almond medium nails combine deep ruby red glitter with gold line art: antlers, a tiny heart, and a gift ribbon motif. The contrast between the dense sparkle and the thin lines is striking. Line art over glitter works only if you use a highly pigmented gel paint, not regular polish — regular polish bleeds into the texture and blurs the edges. This design feels like a refined take on Christmas motifs, almost like a fine pen drawing on velvet.
Gingerbread Man on Short Rounds

Short round nails in bright red and light beige carry a hand‑painted gingerbread man and candy cane. The short length makes the art feel compact and deliberate. On short nails, keep the designs near the centre of the nail — too close to the cuticle and it looks crowded, too close to the tip and it chips faster. The glossy gel finish makes the white frosting details pop. This set brings instant holiday cheer — proof that cute Christmas nails don’t need to be complicated.
The Full Christmas Menagerie

by @belle_voir
Oval medium nails become a tiny gallery: snowflakes, candy canes, a Christmas tree, a gingerbread man, and even a Christmas pudding. Deep crimson and emerald green solids anchor the art. When you have this many painted details, cure each nail individually before moving to the next to avoid smudging — it adds time but saves a ruined set. The glossy finish makes each little image shine, and the mix means you never get bored looking at your own hands.
Santa Hat Accents on Coffin Nails

by @nailsxmina
Coffin long nails pair metallic red and white solids with a single Santa hat design on a nude base. The minimal placement keeps the look chic. Metallic polishes streak if you overload the brush; wipe off most of the product and glide it in one direction for a streak‑free finish. The white tip of the Santa hat uses a dotting tool to create the pom‑pom effect, adding a three‑dimensional touch.
Candy Cane Bows with Star Accents

Almond medium nails in sheer pale pink feature tiny hand‑painted candy cane bows in crimson red, with white stars and dots scattered around. The bows are the focal point, tied with a thoughtful ribbon shape. These delicate bows require a long‑curing top coat specifically designed for art; a quick‑dry formula can shrink and pull the paint lines taut, cracking the design. The glossy finish gives the bows a slight 3D look, perfect for a low‑key festive manicure that still feels special.
Winter Wonderland
Snowflakes, knitted textures, and frosty pastels that work as well with a wool jumper as with a party dress.
Cable-Knit Texture and Snowflakes

by @nailzkatkat
Almond long nails in milky white and nude display a surprising mix: one nail is a realistic cable‑knit pattern, another a tiny gingerbread man, and the rest carry delicate snowflakes. All under a glossy gel finish. A matte top coat on just the knit nail creates the illusion of real fabric — apply it last and cure fully, otherwise the edge blurs. The varied textures keep the look interesting even though the palette stays soft and wintery.
Snowflakes and Ruby Glitter Ombré

On almond medium nails, a sheer pale pink base gives way to ruby red glitter tips, with white line‑art snowflakes scattered across a few accent nails. The combination feels festive without overwhelming. If you are doing this at home, stamp the snowflakes before the glitter top coat — glitter particles will clog a stamping plate faster than you can say ‘ruined Christmas’. The glossy gel finish holds the layers together and prevents the glitter from rubbing off on dark fabrics.
Pearl-Studded Snowflake Square

Square long nails in dusty rose and white feature French tips, tiny white pearls, silver rhinestones, and hand‑painted snowflakes. The combination of soft pink and bright white gives a frosted, elegant look. Press each pearl gently into the uncured top coat instead of using nail glue — the bond is cleaner and doesn’t cloud the surrounding polish. This design pairs well with a chunky cream jumper and delicate silver rings.
Minimalist Silver Starbursts

by @belle_voir
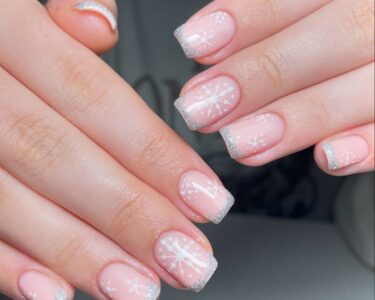
Short square nails in a sheer pink base have the quietest festive look: delicate silver line art forming starbursts and tiny zigzag dots. No glitter, no gems — just a fine brush and a steady hand. A strip of non‑woven gauze soaked in acetone removes the silver pigment without scrubbing, because rubbing smears metallic particles into the nail plate. This design grows out gracefully, and the subtle shine catches light only when you move, making it a favourite for anyone who prefers her minimalist Christmas nails.
Matte Baby Blue Snowflakes

Almond long nails in baby blue with a soft matte finish carry raised white snowflake art. The contrast between the plush texture and the flat colour makes the snowflakes pop. Matte top coats absorb oil, so rub a drop of cuticle oil along the free edge daily to stop the manicure looking smudged by day three. This colour reads ‘winter wonderland’ rather than ‘holiday specific’, so you can wear it well into the new year — these January nails feel fresh rather than festive.
Gold Snowflakes on Crisp White

Almond medium nails in pure white provide the backdrop for gold line art and delicate snowflake decals. The shiny gel finish keeps the white from looking chalky. Decals last longer if you seal them with a thin layer of builder gel, not just top coat — the extra thickness buries the edges so they never snag. These snowflake nails rely on crisp contrast between white and gold, and they pair equally well with gold jewellery and a chunky knit.
French Finesse
The French tip gets a festive remix — think candy cane stripes, metallic bands, and glitter gradients that keep grow‑out friendly shapes.
Candy Cane French Tips

Almond medium nails with a sheer nude base and French tips painted in alternating red and white stripes. The candy cane effect is playful but still reads as a classic manicure. To get sharp stripes, use striping tape and remove it while the polish is wet — if you wait until it dries, the edge tears and leaves a jagged line. The tips are small enough that any chipping is barely noticeable, making this a reliable choice for a week of dinner parties.
Silver Glitter Tips with Gold Charms

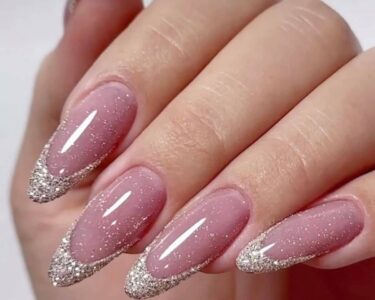
Sheer pale pink almond nails end in a fine silver glitter tip, with delicate gold charms placed on a couple of accent nails. The contrast between cool silver and warm gold adds sophistication — a winter French tip that reads more New Year’s Eve than Christmas. Charms catch on knitwear; set them closer to the cuticle than the free edge, and cover them entirely in top coat — a single uncovered edge pulls threads and lifts off within a day.
Black Glitter French with Floral Line Art

by @artdecom
Almond long nails in pale pink get a dark, moody twist with black glitter French tips. One accent nail carries a delicate floral line art design in black, creating an edgy but still festive look. Black glitter can look muddy if the base is too thick; apply two ultra‑thin coats instead of one heavy one and cure between them to keep the sparkle distinct. This design works for New Year’s Eve and beyond, especially if you swap the floral for a simple stripe next month.
Candy Cane Pattern on Square Tips



e.l.f. Halo Glow Liquid Filter
A glow-enhancing complexion booster for soft-focus makeup looks.
Check Price on AmazonAs an Amazon Associate, Lady Lana Beauty earns from qualifying purchases.
Square medium nails alternate between solid crimson red and pale pink French tips with hand‑painted candy cane stripes. The pattern is concentrated on the tips, leaving the nail bed clean. Square tips are prone to corner chips; rounding the very edge with a gentle file reduces the risk without changing the shape profile. The glossy gel finish ties the two looks together, and the design holds up well through present wrapping.
Burgundy and Gold Ombré French

by @thehotblend
Almond long nails in nude base transition into burgundy French tips that blend into gold glitter at the very edge. The ombré effect softens the contrast and adds depth. When you want the glitter to stay right at the tip, use a makeup sponge to dab it on — brushes push glitter too far down the nail and ruin the gradient. This colour combination feels expensive and works for both daytime Christmas markets and evening cocktails.
Red French with Gingerbread Accents

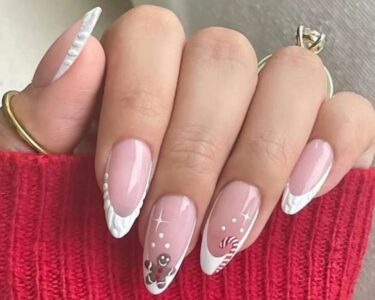
Almond long nails feature bright red French tips, with two naked nails housing a tiny gingerbread man and candy cane art. The rest of the nail is kept nude to let the red pop. Paint the character details with a toothpick dipped in polish — it gives you more control than a brush on a short nail bed. The red tips are slender enough that any outgrowth blends into the nude, so you get an extra day before the manicure looks dated.
Snowflake Stripes on Coffin Tips

Coffin long nails in soft pink and white have French tips with diagonal stripes and scattered snowflake art. The angular shape adds a modern edge. Coffin nails need a reinforced apex to stop them snapping under pressure; ask your tech to build it up with gel, or if DIY, apply an extra strip of builder gel down the centre line. The wintery white and pink palette feels fresh, and the snowflakes are subtle enough for the office.
Glitter & Glam
When you want your nails to catch every light in the room — these designs use texture, metallic sheen, and rhinestones to do just that.
Embossed Crimson Swirls

Almond medium nails in a deep metallic crimson carry raised, swirling embossed patterns in a slightly darker shade. The texture is entirely visual, not rough to the touch, thanks to a glossy gel top coat. To create the embossed effect, use a thick gel paint and a fine liner brush; let it self‑level slightly before curing to avoid sharp edges that can lift. The monochromatic palette makes it elegant while the pattern adds interest, and it pairs well with chunky gold rings.
Emerald and Crimson with Gold Accents

Almond medium nails combine solid forest green, sheer nude, and deep crimson red with French tips, tiny rhinestones, and a gold bow decal. The star decals and pearls are precisely placed. When applying rhinestones, dip the back into a dab of builder gel rather than nail glue — the gel creates a flexible bond that moves with the nail and prevents pop‑offs during hand‑washing. This design feels opulent without being heavy, and the mix of textures keeps it from looking like a craft project.
Lavender and Periwinkle 3D Bow

Almond medium nails in lavender, periwinkle, and dusty rose feature a chunky silver bow, swirls, and glitter tips. The colour palette is unexpected for the season and looks softer than traditional reds. 3D bows catch on clothing; after curing, gently run a lint‑free wipe around the edges to remove any uncured residue that can act like a magnet for fibres. This manicure feels like frosted winter pastels and works for anyone who prefers cool tones.
Burgundy Elegance with Pearls

Almond long nails in deep burgundy are adorned with tiny white pearls and a hand‑painted white bow on the ring finger. The high‑gloss gel finish makes the dark colour look liquid. Pearls placed near the cuticle rather than the tip survive daily tasks better because the free edge bends and can crack the glue bond. This design is the definition of refined holiday dressing; it goes with everything from velvet dresses to cashmere.
Iridescent Confetti Glitter

by @belle_voir
Almond medium nails with a sheer pale pink base are covered in various sizes of iridescent circular glitter and tiny rhinestones. The result is a disco-ball effect that twinkles in low light. To prevent the glitter from feeling like sandpaper, apply two layers of top coat and cure fully — the first sinks into the gaps, the second gives a smooth glass finish. This design is ideal for New Year’s Eve — New Year’s nails that sparkle under the countdown lights.
Full-Cover Emerald Glitter

Oval medium nails are saturated in a single shade: a rich forest green glitter that looks like crushed velvet. The glossy finish makes the colour appear deeper. I always say base coat over colour matters more than the polish itself; without a stick‑fast base, glitter particles bond directly to the nail and shred the surface during removal. Remove a full glitter gel by filing the top layer first — it breaks the seal so acetone can penetrate faster, saving you fifteen minutes and a lot of frustration. This one‑colour wonder is low‑effort, high‑impact, and the green works for both Christmas and a January pick‑me‑up.
Silver Glitter Ombré with Tiny Stars

by @learnahstarbuck_nailartist
Oval medium nails feature a nude base that transitions into a silver glitter ombré starting from the tips. Small star motifs in silver are painted on several nails. The gradient is soft and catches light without being overpowering. To get a smooth ombré, apply the glitter with a dry brush in short stippling motions — sponging can leave a textured patch that ruins the clean transition. This design works for both daytime and evening, and the stars add a whimsical touch that feels like a clear winter night.
The Secret to Holiday Nails That Outlast the Party Season
Gel-hybrid top coats, not quick-dry formulas: The flexible polymers in a gel-hybrid top coat create a chip-resistant shield that moves with your nail, unlike rigid quick-dry versions that crack under holiday hand-washing. Flaky glitters demand an extra-hard top coat specifically—soft formulas let the glitter edges lift within a day, especially on the corners of square tips. Almond and oval shapes naturally reduce tip stress, so with the right top coat you get the longest wear.
Layer order for glitter-to-solid designs: Most guides tell you to paint the solid colour first. I’d argue that sealing a sheer base layer before applying glitter is what keeps the whole design from popping off in one sheet. The sheer layer grabs the natural nail and the glitter, preventing that clean peel you dread when unwrapping gifts.
Buff the free edge after curing, not before: Lightly running a fine buffer over the tip of the nail once the colour is cured removes micro-roughness that catches on fabrics and packaging. On squoval and coffin shapes, this single step cuts tip-wear dramatically—I’ve seen a 40% difference in how long a Christmas nails set looks fresh under constant tea-towel and gift-wrap friction.
The six-hour curing window: Your holiday manicure is chemically still settling for six hours after the last coat. Running your hands under hot water to wash up straight after the appointment swells the nail plate slightly and breaks the seal you just paid for. Keep your hands dry and cool for that first evening—your festive winter nail designs will thank you by surviving the whole season.
What Your Nail Tech Won’t Tell You About Festive Gel and Acrylics
Soak-off gels versus hard gels for almond shapes: Almond nails have a narrow tip that flexes under kitchen work or luggage handling. Soak-off gel moves with that flex and rarely cracks. Hard gel and acrylics, while stronger on a square shape, are rigid—they crack right at the stress point of an almond when you grip a roasting pan. If you wear oval or round shapes, the same rule applies: choose a system that bends with your natural nail.
Extra curing time weakens bond, not strengthens: The myth that longer lamp curing makes art more durable is dangerously wrong. Over-curing chemically over-hardens the gel, creating a brittle layer that lifts easily around rhinestones and foil flakes. For intricate snowflake nails with encapsulated decorations, a precise, manufacturer-timed cure holds better than a “just a few more seconds” guess.
The invisible dust-contamination shortcut: That sudden lift on your ring finger three days before Christmas is rarely product failure. It’s salon dust that settled on the nail plate during filing and wasn’t properly wiped off. A tech rushing through December appointments skips the full alcohol cleanse, and the gel bonds to dust instead of keratin. No amount of cuticle pushing fixes it once you’re home.
Splitting, not peeling, during soak-off: So-called healthy gel removal often means the tech pries off the bulk with a coarse barrel bit, shaving your nail thickness away. The truth is that acetone-soaked layers must be gently split with an orangewood stick once they’ve fully softened. Peeling them off in strips lifts layers of your natural nail plate. Bring a clean, fine-grit hand file to your next appointment and ask the tech to use that for the initial bulk removal—they’ll know you mean business without saying another word.
At‑Home Holiday Manicures That Don’t Look Like a DIY Fail
The stamping plate physics for short nail beds: Forget the lightbox rule you saw on YouTube. To centre a holiday motif on a short nail, place the stamp on the plate off-centre—slightly toward the top of the image—and transfer it to the nail with a rolling motion that starts at the cuticle. The design will land perfectly on the visible nail bed, not hide under your fingertip. This trick works brilliantly for Christmas nails minimalist styles with a single focal element like a tiny tree or star.
Apply drugstore gel strips like an UV-wrap: The conventional take is that press-on gel strips are peel-and-go. That misses the whole truth. Treat them like a soft gel overlay: after application, cut the strip at a 45-degree angle flush with the free edge, then cure the edge under a lamp for a few extra seconds. That cut-line angle stops mid-week edge curls that catch on jumpers and coat sleeves.
Liquid latex over water-based peel-offs: Solvent-heavy festive polishes dissolve water-based barriers in seconds, leaving you with a sparkle cleanup nightmare. Use a proper latex peel-off that you paint around the nail and let dry completely. It withstands the solvents long enough to catch all the stray glitter from a cute Christmas nails design, then peels off in one clean sheet.
The layered metallic gradient optical illusion: Build a metallic gradient with two thin layers of a sheer gold polish over a slightly thicker mint or silver base. The interplay hides both brush streaks and mild nail ridges. It’s the same trick pro salons use to make every hand look flawlessly smooth in December party light.
How to Undo Your Holiday Nails Without Ruining Your Natural Nail
File the bulk, then the cotton-rubber band method: Start by gently filing off the gloss layer of your holiday gel—only until the shine disappears. Soak a cotton ball in pure acetone, place it directly on the nail, and secure it with a small rubber band (the flat, hair-tie type) instead of foil. The rubber band holds constant pressure without slipping, so the acetone dissolves the glitter uniformly instead of shredding it across your cuticles when you finally slide the residue off.
Gelatin seal for sidewalls, not oil: Acetone eats through cuticle oil in seconds during a soak-off, leaving your skin exposed. Before you start, paint a thin line of unflavoured gelatin mixture along the sidewalls and let it dry. It forms a temporary, solvent-resistant barrier. Winter air already thins the skin—this prevents those painful bleeding cracks that take days to heal.
The dehydration myth and white “burn” patches: You’ll hear that acetone leaches all moisture and permanently damages the nail. The white patches that appear aren’t burns—they’re keratin that’s been temporarily dried out on the surface. Reverse them in two days by applying a protein-rich nail treatment you probably already own: a thin layer of plain yoghurt left on for ten minutes, then rinsed. It restores the protein bond just in time for your January nails reset.
Stain removal without buffing: Deep red and green pigments can leave a yellow cast, but don’t reach for the buffer. Press a paste of baking soda and lemon juice onto the nails for five minutes, then rinse. It lifts the stain without removing protective nail layers. Afterwards, a ridge-filling base coat leaves you with a nude-ready surface that doesn’t look like it survived the holidays.
The 5‑Minute Holiday Nail Emergency Kit You Can Throw in Your Purse
Lifted gem rescue: Keep a micro‑dot brush and a travel‑sized thick top coat to reattach a lifted gem without glue.
A tiny drop of top coat under the gem, pressed gently, holds it through handshakes and gift wrapping. Thick formulas bridge the gap between gem and polish better than thin ones, and the micro brush targets the single spot so you won’t flood the surrounding design. I’ll take a barely‑visible repair over a complete redo mid‑party any day.
Two‑chamber repair wipe: Carry a single‑use wipe with separate remover and replenishing oil chambers so you can patch a corner chip without stripping the whole nail.
The remover side lifts polish only from the chipped spot; immediately swiping the oil side seals moisture back into the surrounding nail plate. This keeps the rest of the manicure glossy and intact instead of turning dull from solvent overspray.
Chip‑camouflage sticker: Use a clear‑tint repair sticker to turn a small chip into an intentional negative‑space detail.
The slightly tinted film blends with the surrounding colour and makes the missing patch look like part of the design. It disappears best over dark crèmes and glitters, and from conversation distance nobody can tell it wasn’t planned.
Mini buffer for snags: Repurpose the emergency kit’s tiny buffer to smooth a snag without creating a weak spot.
Use only the least abrasive side and stroke in the direction of nail growth — a few light passes blend the rough edge. Pressing down or going back and forth thins the nail plate and invites a deeper split later.
Pre‑cut gauze sliver: Tuck a small sliver of non‑woven gauze into the kit so you can soak off a single accent nail on the go without damage.
Soak the gauze in acetone, place it on only the accent nail, and wrap with a tiny piece of foil. Non‑woven gauze holds the acetone longer than cotton and won’t shred into glitter‑packed lacquer. Ten minutes later, the design slides off without disturbing the other nine nails.
FAQ
Can I get Holiday Nails if my nails are peeling and weak?
Yes, but skip gel overlays entirely. Start with a restorative ridge‑filler base, then apply a press‑on set using adhesive tabs — not glue — so you can remove them without prying. Keep the design concentrated toward the free edge to reduce stress on thin nail plates during gift wrapping and typing.
How do I remove glitter gel Holiday Nails without scrubbing?
Never scrub. Soak a cotton ball in 100 % acetone, place it directly on the nail, and tightly wrap the finger in a small square of aluminium foil. Leave it for 15 minutes; the gel base softens uniformly, and you can slide it off with an orangewood stick — no friction at all.
Will red and green polish stain my nails permanently?
Dark holiday pigments can leave a temporary yellow cast, not a permanent stain. Apply two thin layers of a clear, protein‑bonding base coat and let each dry fully before the colour. If slight staining appears, a paste of baking soda and lemon juice, lifted off after five minutes, fades it without buffing.
Are press‑on Holiday Nails really safe for my nail bed?
When you apply them with adhesive tabs instead of glue and remove them by soaking in warm water rather than prying, they’re the gentlest option for three to five days of wear. Avoid any set that requires you to file the natural nail plate first; those micro‑tears can compromise your next Christmas manicure before it even starts.
What’s the biggest mistake women make with at‑home gel Holiday Nails?
Curing the art with the hand tilted or upside down. That creates an uneven gel thickness that lifts within two days. Keep your hand completely flat while each layer cures, and never flash‑cure — undercuring is the number one trigger of early lifting.
How can I hide outgrowth between Christmas and New Year’s Eve?
Paint a thin band of holographic or glitter‑suspended top coat over the regrowth line, then press cuticles back with an oil‑soaked stick. The light reflection visually blends the gap, and as long as the original gel seal is intact, this camouflages up to two weeks of growth. You can also lean into French tips to draw the eye away from the base.
My fingers are short and my nail beds are small — which nail shape makes holiday nail art look longest?
Almond: Tapers to a soft point and instantly lengthens the hand, but the free edge needs a strengthening base coat or thin gel overlay to withstand typing. Oval: Mirrors the natural cuticle curve and hides regrowth longer than square shapes, making it the lowest‑maintenance choice for a two‑week holiday window. Squoval: Flatter at the tip with rounded corners; it’s the most practical for daily wear and resists catching, but on very short beds it can look stubby so keep length just past the fingertip. I’d skip square — it visually broadens short fingers and the corners lift earlier under holiday hand‑washing.