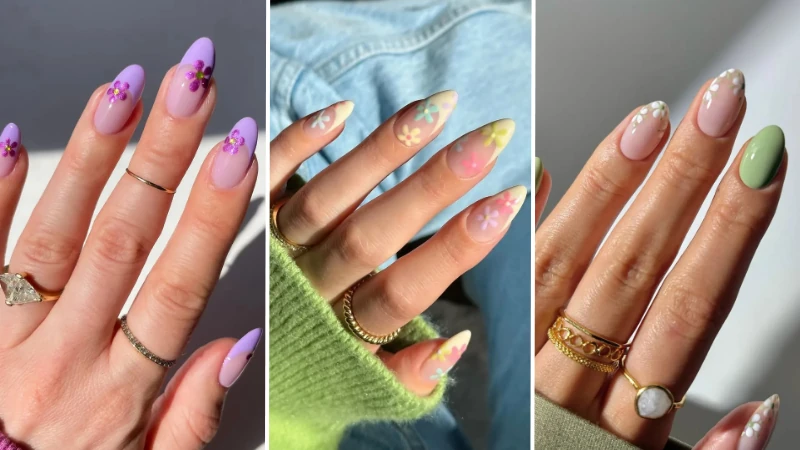
You open Pinterest, hoping for fresh March Nails that will last past the first hand wash, and what do you see? Shamrocks that chip within hours, pastels that look nothing like the photo, and advice that forgets your nails are still recovering from winter. The problem isn’t the colour — it’s that most March nail art assumes your nails are ready for spring when they are brittle, dry, and peeling. You need designs that work with real nails, not against them. And you need them to last through a full month of weather swings, parades, and the odd spring cleaning.
Before you commit to a fresh manicure, consider how your nail health affects longevity — start with stronger spring nails by treating them first. And if you want holiday-specific designs that actually survive the weekend, St. Patrick’s Day nail ideas can be layered to last past the celebration.
23 March Nails For Every Spring Mood, From Minimalist to St. Patrick’s
These 23 March nails are grouped by style, so you can skip straight to the look that fits your week. You will find soft pastels, floral details, playful patterns, and a few designs that give a quiet nod to St. Patrick’s Day. And if you need to stock up on shades, I have a whole page on spring nail colours that actually last.
Soft & Simple Pastels
When all you want is a clean, fresh feel. These designs rely on understated colour and shape — no fuss, just easy.
Buttery Yellow One Colour Gel

An all over pale yellow that lands somewhere between lemon curd and early daffodils. The oval shape keeps it practical for typing and daily wear, while the glossy gel finish catches the light without needing any embellishment. Warm toned yellow can streak on bare nails — use a ridge filling base coat to get that glassy surface from the first stroke. This shade works across skin tones and pairs with everything from denim to grey knits. I prefer this kind of set for March because it still reads “spring” even when the weather refuses to cooperate. One solid colour, one good top coat, and you are done.
Minimalist Speckle on Nude

Sheer nude base scattered with tiny, irregular black specks — like a very well-behaved dalmatian print. The oval medium length keeps it wearable, and the negative space feel means regrowth stays invisible for a full week. To get the speckle effect right, flick an old toothbrush dipped in black polish rather than using a dotting tool — it delivers that natural, random placement. Gold rings do all the heavy lifting here; the nails stay quiet. This is the kind of set that goes from a client meeting to a Saturday market stall without ever feeling out of place. Minimal but with just enough texture to be interesting.
Sage Green Marble Gel

Long almond nails swirled with pale sage and soft white create a marble effect that reads expensive but is surprisingly simple with a blooming gel or water marble technique. The glossy top coat deepens the veining and makes the colours shift gently. Marble designs eat up top coat — apply two thin layers instead of one thick one, or the pattern softens unevenly. The sage is muted, almost grey in some lights, which makes it a true neutral. Long almond nails like this show off the pattern well, but honestly shape matters more than length. A shorter almond still gives that elegant line, and the marble effect works on any free edge.
Sunny Yellow Micro French

by @lillypalm__
Short square nails with a sheer nude base get a lift from pastel yellow French tips, each decorated with one tiny pink flower. The shape is practical — no snagging on jumpers — but the micro French adds just enough detail to feel intentional. When painting French tips freehand on short nails, use a liner brush and rest your pinky on the table to steady your hand — otherwise you will colour outside the lines. This design reads “spring” instantly, even on the shortest nail beds. The yellow tip feels like a sunlit hemline; the flower keeps it sweet without tipping into childish territory.
White Daisy Dot Flowers

by @heluviee
A sheer baby pink base with simple white daisies created from five dots and a tiny centre. The oval shape makes the hand look longer, and the high gloss finish keeps the white looking crisp. Use a dotting tool, not a brush — the petals stay rounder, and you can fix mistakes with a quick swipe of alcohol before curing. This design works for almost every March occasion: it is fresh enough for spring, neutral enough for the office, and cute enough for a weekend outing. I love how the sheer base lets your natural nail line peek through — it makes the whole thing feel lighter than a full cover pink.
French Tips With a Twist
French tips, but not the thick white lines you remember. These versions bring soft colour, floral details, and a lighter touch.
Speckled Pink French With 3D Flowers

Almond medium nails painted with a sheer pink base and creamy white tips covered in pinhead sized brown polka dots. Two accent nails carry 3D pink flowers with tiny gold centres that sit just above the nail surface. Seal around each 3D flower with a thin brush of top coat — water gets trapped in the crevices and lifts the design within days. The speckled tip adds a vintage note that stops the pink from feeling too sweet. Gold rings enhance the warm tones, and the whole set feels like something you would wear to a spring garden party, even if your actual garden is still mud.
Mint Tipped Spring French

by @bynicolemv
Long almond nails with a barely there pink base and light green, almost mint, French tips. Small hand painted white and dusty rose flowers sit at the cuticle or on the tip line. Pastel green French tips show every wobble — sketch the smile line with a pencil tool first, then fill in, so you do not have to redo half the hand. The colour combination feels like an early garden, and the gel overlay prevents the free edge from flexing and cracking the tip colour. This set needs a steady hand, but once cured, it holds its freshness for a solid ten days.
Lavender Glitter Flower French

Oval medium nails with a clean lavender French tip and a scattering of tiny purple glitter flowers on the accent nails. The glitter stays put because it is embedded in a clear gel layer, not just sprinkled on top. Mix fine glitter into your clear builder gel, not into the colour — it distributes evenly and does not clump. The lavender reads soft, not loud, so it works for everyday wear. Gold jewellery picks up the glitter sparkle without competing. I like this one for the week after St. Patrick’s: it still feels festive but not themed, and the oval shape softens the whole hand.
Sky Blue Floral Tips

A negative space design on almond medium nails: the nude base fades into delicate pale blue flowers painted only at the tip. The effect is like a reverse French, replaced with tiny blossoms. When painting detailed tip florals, cure after each colour layer so the petals do not bleed into each other — patience pays off here. This look grows out invisibly, so you can wear it well into late March without touching up. It pairs nicely with light denim and soft knits, two things we all live in this time of year. A truly low maintenance spring set that still feels considered.
Multicolour Pastel French

Each almond medium nail gets a different pastel French tip — pink, mint green, mustard yellow — with tiny matching hand painted flowers at the base. The mix of colours keeps it playful without feeling chaotic. If you want the tips to look uniform, use tip guides, but for a more organic feel, freehand them and accept slight variation — real flowers are not identical either. A glossy top coat unifies the look. Perfect for spring when you cannot commit to a single colour and want each finger to tell a slightly different story.
Soft Sage Square French

by @allnailss._
Square medium nails with a sheer pink base and a thin, pastel green French tip that curves gently. Small white flowers with yellow centres are placed on a couple of nails, keeping the design from feeling too plain. Square tips work best for short to medium lengths because long square nails can look heavy — keep the free edge straight and file only lightly. The sage green is cool toned, so it flatters both olive and fair skin. A tidy look that never tries too hard. It is the manicure equivalent of a crisp white shirt, but make it March.
Spring Florals in Full Bloom
For the days you want your nails to feel like a tiny bouquet. These designs go all in on colour and petals. If you cannot get enough of this look, I have collected even more floral nail ideas for the season.
Pastel Mix and Match Blooms

A playful mix of oval nails: some wear pale yellow, dusty rose, or bubblegum pink French tips, while others are fully covered in tiny hand painted flowers. The look is cohesive because the colour palette stays within soft pastels. A thin, flexible top coat prevents cracking when you combine multiple gel layers — thick ones get rigid and chip at the stress points. This set is ideal if you want a different flower on each finger but still need it to read as one manicure. It manages to be cheerful without being sugary, which is a harder balance than it looks.
Emerald & Blush Coquette Set

A mix of solid light pink, solid deep emerald green, and decorative nails featuring pink flowers and a tiny green bow. The oval medium shape keeps the look feminine without being fragile. Dark green polish stains like nothing else — use two coats of a tinted blurring base coat underneath to block the pigment from reaching your nail plate. The bow motif adds a romantic, coquette feel that surprisingly suits March, especially with a chunky knit and gold rings. This set says you are still holding onto winter drama but ready for something fresher.
Sage and Daisy Duo

Some nails are painted solid sage green; others are sheer nude with delicate white hand painted flowers. The combination breaks up the green so it does not overpower. When alternating solid and sheer nails, apply the solid colour first — any cleanup from the sheer side can blur the nude base, so work clean. The sage is soft enough to read neutral, making this set an easy transition from grey winter jumpers to lighter spring tops. It looks equally at home with a linen blouse or a woollen cardigan.
Buttermilk With 3D Florals

Long almond nails painted a pale, creamy pastel yellow, each accented with a small white 3D flower charm that has a gold centre. The charms sit flat enough to avoid catching on clothing, but you will still feel them. Apply a thin layer of builder gel over the charm to enclose it — otherwise it will snag on tights and lift off halfway through your day. The yellow is warm and milky, not neon, so it complements rather than competes with the white petals. A delicate, slightly romantic set that feels like spring sunshine bottled.
Field Daisies on Nude

by @disseynails
Sheer nude almond nails painted with tiny daisies in light yellow, soft pink, and mint green. The flowers are scattered, not packed, leaving plenty of negative space so the design stays airy. When painting tiny daisies, do not overblend — keep each petal a single stroke; multi layered petals on short nails look muddy from a distance. This manicure really comes alive in natural light, where the sheer base catches the sun and the daisies pop. It is the kind of set you catch yourself staring at during a meeting. Simple, but it makes you smile.
Confetti Wildflower Print

A sheer base covered with tiny, multicoloured flower patterns in pink, sage, lavender, yellow, and sky blue — like a meadow after rain. The almond medium shape keeps the busyness contained. To avoid a cluttered look when using so many colours, stick to one accent nail per hand and leave the others in a single coordinating pastel. The sheer background lets the flowers breathe and means regrowth stays hidden. Pair with simple jewellery so the nails do all the talking. This one feels like a celebration of the season without needing a specific holiday.
Playful Patterns & Prints
When subtle is not the assignment. These sets bring dots, stripes, plaid, and a wink at St. Patrick’s Day.
Green Glitter Garden Mix

by @disseynails
Long almond nails that mix sage green glitter, white French tips, and dainty yellow and pale pink floral designs. The glitter nail adds a festive touch without being a full on disco ball. Glitter gel needs a careful top coat application — float the brush gently so you do not drag the glitter pieces and leave streaks. This set balances spring freshness with a little St. Patrick’s sparkle, so it works for a pub afternoon and Monday morning alike. The sage glitter is particularly clever: it catches the light but reads almost neutral in shadow.
Dot & Stripe Art Mix

by @_nasanails
Almond medium nails featuring a playful mix: some have vertical stripes, others have tiny polka dots, and some keep it simple with French tips. The colour palette — dusty rose, deep burgundy, pale yellow — feels warm and slightly vintage. Striped nail art on a curved nail bed requires a steady hand: tape off sections only after completely drying the base, or you will lift the polish. This is a great design for anyone who gets bored with a single look by day two. It is a bit like wearing a different outfit on each finger, but the shared palette pulls it together.
Plaid & Dot Mash Up



e.l.f. Halo Glow Liquid Filter
A glow-enhancing complexion booster for soft-focus makeup looks.
Check Price on AmazonAs an Amazon Associate, Lady Lana Beauty earns from qualifying purchases.
A cosy but polished set: almond medium nails with a mix of burgundy and pink plaid, white polka dots on a sheer base, and classic French tips. The plaid feels like a leftover winter scarf, but the pink keeps it spring. For plaid gel art, cure between each line colour to prevent bleeding — building the pattern slowly ensures crisp intersections. This design looks especially good with a neutral trench coat and a coffee cup in hand. It is basically March in nail form: a little winter, a lot of promise, and just enough structure to last through a busy week.
St. Patrick’s Lucky Text Set

The only set in this list with a clear holiday message: almond medium nails mix cream and maroon French tips, horizontal stripes, and tiny polka dots, while one accent nail spells out “LUCKY” in gold. For hand lettering text, use a fine dotting tool and work upside down — it helps your brain focus on shape rather than meaning, which reduces errors. The maroon keeps it from looking like a costume; the gold lettering makes it feel deliberate. Ideal for the weekend of the parade and easy to change after. If you want more openly shamrock focused ideas, I have some St. Patrick’s Day nail designs that go bigger.
Mint & Cocoa Dot Duo

Long almond nails that alternate between solid mint green with dark brown dots and solid chocolate brown with light mint dots. The high contrast polka dot is crisp and graphic. To make dots perfectly round, dip the dotting tool in fresh polish before each nail — dried polish on the tool flattens the shape. This combination is unexpectedly versatile: it looks great with both cream jumpers and black blazers. The green carries a whisper of St. Patrick’s without being obvious, and the brown grounds it so the whole thing feels current rather than novelty.
Pastel Patchwork With Flowers

Long almond nails featuring a patchwork of pastel colours: some nails have mint green French tips, others have lavender or lime green with tiny floral motifs and negative space. The overall effect is bright and cheerful, like a spring picnic. Negative space designs need a precise clean up brush dipped in acetone to define the edges — otherwise the sheer base turns cloudy. This set is for the woman who wants every finger to be a little conversation starter. It manages to be busy and clean at the same time, which is a neat trick for transitioning out of dark winter shades.
Why Your March Mani Needs a Pre‑Spring Rehab First
The dehydration you can’t see: Indoor heating saps moisture from the nail plate all winter long, leaving it flex-prone right when you’re reaching for pale spring colours. Most women slather on cuticle oil minutes before painting and wonder why polish pops off within two days. The nail needs deep, consistent rehydration days ahead, not a last-second slick. I’ve watched pastel polishes split along invisible dry stress lines that oil alone can’t mend in a hurry.
The 7‑day buffer rule: Instead of painting on brittle nails, commit a full week to conditioning before you open a polish bottle. Products like IBX repair treatments work beneath the surface, bonding the nail layers from inside out. Pair this with daily warm jojoba soaks and you build a flexible foundation that holds colour far longer. One round of proper cuticle removal during that buffer week makes the final manicure line cleaner than any ridge filler ever could.
Why your nail shape decides how breakage plays out: Too-stiff squares on short fingers create leverage snaps at the corners; the same winter-dry square nail becomes a liability in March gardening. Almond and coffin shapes elongate shorter fingers well, but they need a stronger free edge—you build that with a thin layer of builder gel under polish, not a brutal hardener. Oval nails diffuse pressure evenly across the tip, which is kind to brittle spring plates, while squoval offers maximum chip resistance for hands that hold phones or keyboards all day. The shape you pick determines where your rehab effort should concentrate, not just the look.
The ridge‑filling primer lie: Cheap ridge fillers coat over the problem without flex. When pastel spring nails shift in changing temperatures, that rigid filler cracks underneath and takes the colour with it. A flexible base coat—like a rubberised bonder—lets the nail move while keeping the polish film intact. It’s the difference between a manicure that looks smooth on day one and one that still looks smooth on day ten.
Your grandmother’s nail‑hardening recipe backfires hard: Treatments loaded with formaldehyde cross-link the keratin so aggressively that nails become glassy; one knock against a car door and they snap halfway down the bed. March needs supple strength, not stiffness. Modern alternatives with calcium and protein hydrolysates reinforce without sacrificing that slight give a living nail must have.
From Shamrocks to Subtle: Transitioning Your March Mani Past the Holiday
The strip‑down design trick: Layer your nail art so the festive part sits on top—think a water decal or loose foil shamrock over a neutral jelly base. After the party, gently peel or acetone-zap just the top element, revealing a clean spring colour underneath. No full redo, no rushing to the salon on Monday morning. I keep a bottle of gentle non‑acetone remover and a pointy orange stick precisely for this task.
The 3‑day rule for holiday nails: Apply festive St. Patrick’s day nails three days after a fresh base manicure, not the same afternoon. This lets the underlying polish fully cure against the nail, so when you remove the shamrocks later, you’re not accidentally peeling the base with them. It also shortens the time you walk around with clover accents in case the office feels less festive than the pub.
Office‑appropriate camouflage: A sheer matte top coat over shiny green motifs diffuses the colour right down. Suddenly, what screamed party reads as understated gold‑green abstract dots. This works brilliantly on accent nails that might otherwise shout “weekend holdover” during a Monday meeting.
Negative‑space elegance: Choose holiday designs that live within cuticle arches or thin curved lines rather than full‑nail coverage. A single minimalist shamrock outline near the lunula feels deliberate and delicate, not leftover. By the time Easter approaches, the same pattern transitions seamlessly into spring blossoms if you’ve kept the scale small. The trick is leaving at least sixty percent of the nail bare—bare sections don’t look dated.
The dry‑wipe polish change: For a quick accent colour swap, soak a lint‑free pad in non‑acetone remover, press it onto the accent nail inside a remover clip for sixty seconds, then gently wipe. No cotton fibres, no flooding the cuticle. Follow immediately with a tinted sheer top coat in a fresh spring nail idea shade, and you’ve shifted the whole mood of your manicure without touching the other nine nails.
Gel vs. Regular Polish: Which Survives March’s Chaos (and Your Budget)
The humidity trap no one mentions: March air yo‑yos between damp and dry, and regular polish absorbs and releases moisture as the nail plate swells and shrinks. That microscopic movement breaks the polish‑to‑nail bond within days. Gel behaves better because it cross‑links into a rigid network, but the edge still needs proper capping to block water ingress. I see far fewer mid‑week chips with gel—provided the prep wasn’t rushed.
The UV index effect: Spring sun strengthens, and gel colours—especially sheer whites and pastels—can yellow if the top coat lacks blue‑light filters. Many quick‑grab top coats skip this. I always reach for an UV‑filtering gel top coat once March daylight hours stretch; it keeps milky nudes looking clean for weeks, not days.
The hidden cost of cheap gel: LED‑only gels on low‑wattage lamps under‑cure at the free edge. That soft spot lifts first, and you’ll curse your cuticle prep when it was actually the lamp. You need at least 36 watts in a LED‑UV hybrid lamp for reliable curing. Spending on the right wattage once saves endless re‑do frustration, especially if you’re shaping french tip spring nails where the white edge demands full cure.
Regular polish’s unfair advantage: It’s fixable anywhere without a lamp. A tiny nail‑polish‑soaked sponge, wrapped in foil, melts a snag on the go; gel can’t be spot‑repaired. I carry a mini‑bottle of matching sheer nude in my bag, and the moment a tip wears, I dab, glide on top coat, and it’s invisible by the time the kettle boils.
The steam‑soak removal compromise: Rather than pure acetone baths that turn cuticles to parchment, hold gel nails over a bowl of hot steamy water inside a towel tent for five minutes, then apply acetone‑soaked cotton with gentle pressure. The heat softens the gel network, so you use less solvent. Your cuticles stay intact through spring’s constant hand‑washing—and less damage means your next May nails will glide on without streakiness.
5 Mistakes Women Make With March Nails (That Ruin Their Manicure)
1. They skip the “spring proof” top coat: A fast‑dry top coat hardens so much that the first warm‑cold swing splinters it like thin glass. A slow‑cure, flexible glossy top coat absorbs temperature changes without cracking. You sacrifice five extra drying minutes for ten extra chip‑free days—worth it every time in March weather.
2. They ignore their dominant hand’s cuticle wear pattern: The thumb and index finger holding a smartphone endure micro‑abrasion that lifts the polish near the proximal fold. Instead of hoping it holds, focus extra cuticle oil exactly there on day three and reseal the edge with a dab of stiff top coat. I halved my dominant‑hand chipping by doing just that, no other change needed.
3. They use full‑coverage glitter as a design instead of a shield: Fine‑grit holographic glitter placed just along the smile line—not across the whole nail—acts as a protective cap that wears gradually and well. It’s functional reinforcement that happens to catch light. No one mistakes it for a kid’s craft project.
4. They peel off gel March nails to “save time”: The keratin layers rip away unevenly, leaving grooves that grab pastel polish unevenly for months. To break the habit, apply a peel‑off base coat under the gel system. Some formulations actually grip well for ten days if you buff lightly first, yet they release cleanly with an orange stick and warm water—no acetone required, no damage done.
5. They forget that spring water activities start now: Brunch mimosas clinking, garden‑center potting, even longer showers—all swell the nail plate and pop polish that wasn’t sealed at the free edge. After your colour dries, run the top coat brush flat across the very tip, from sidewall to sidewall. That thin border stops water from finding a micro‑gap. Most techs call it “wrapping the tip”; I call it non‑negotiable if you want your April nails to still look fresh from March’s effort.
The March Nail Emergency Kit: Exactly What You Need in Your Bag
Ethyl Cyanoacrylate Nail Glue: Keep a tiny brush‑on glue that uses ethyl cyanoacrylate, not the standard formula.
Most nail glues contain methyl cyanoacrylate, which clouds pastel polish and leaves a white haze exactly where you need the repair to disappear. Ethyl cyanoacrylate bonds clear and flexes with the nail, so a midday split through a marbled March nail art design doesn’t become a frosty eyesore. A small tube costs less than a coffee and fits into any coin pocket.
Pre‑Saturated Crack‑Fix Sponge: Seal a small makeup sponge soaked with a drop of non‑acetone remover and one drop of your base colour in a foil packet.
Dab, don’t rub, and the sponge melts the topmost layer of polish just enough to fill the crack. The solvent evaporates in seconds, leaving a smooth, sealed surface that blends into spring nail colours like mint and lavender without a complete repaint. I make two of these at the start of the month and they stay wet inside the foil for a week.
Matte Top Coat Mini: A travel‑sized matte top coat turns a shiny chip into an intentional texture.
One swipe across a flawed area diffuses the light so the damage reads as a deliberate matte accent, not a mistake. It works on any shade, and because it dries in under a minute, you can apply it standing in the queue for coffee. I prefer matte over glitter for this trick—glitter shouts, matte whispers.
Orange‑Wood Stick: An orange‑wood stick will push a lifted edge back into place without scraping.
Files create dust and rough up the surface, but rolling the flat side of a tiny orange stick over a lifted polish edge re‑adheres it to the nail plate temporarily. The wood is soft enough not to scratch, and the pressure reactivates the tacky layer underneath. This works especially well along the sidewalls where water and oils creep under and start the peeling.
Rescue Sheer Nude Polish: A sheer nude that matches your nail bed hides wear on any March design.
When the tips of your nails start showing after day four, dab a thin coat over the free edge and down the centre. It freshens the entire look without lifting the original art, and the warm beige undertone blocks stains and wear marks better than a clear top coat. I’d rather a quiet, polished look on day five than a design that only worked for a photo.
FAQ
Will March nail designs look childish on short nails?
Not if you shrink the motif. A single micro shamrock or a fine green stripe along one side reads as delicate jewellery, not a sticker. When you’re working with short nails, negative‑space designs and thin metallic lines actually look more polished than full‑coverage patterns because they let your natural nail show through.
Can I do March Nails at home without an UV lamp?
You can with press‑ons that use adhesive tabs instead of glue. Look for hand‑painted sets with short‑wear tabs; they last a weekend of party hopping and slide off with warm water and a drop of cuticle oil, leaving zero damage. That way you get the intricate March nail art without committing to a whole month or buying a lamp you might not use again.
How do I keep green polish from staining my nails?
Paint a blurring base coat in a warm beige tone over your regular base before the green goes on. A white base coat often amplifies pigment migration, but a beige tint blocks the yellow‑green dye from reaching the nail plate. Double base layers take two extra minutes and make the difference between stained talons and a clean removal.
What if I hate my March Nails the next day?
A magnetic cat‑eye topper in silver or rose gold shifts the entire manicure without a full redo. Swipe it on and hold the magnet over the nail for ten seconds; the shimmer distracts from the colour you fell out of love with and makes your original design look like a deliberate base layer. It peels off with a gentle remover when you’re ready to try something else.
How do salons make March nail art last two weeks?
They use a bonding primer before base coat, cure each gel layer twice as long as the bottle suggests, and never touch the free edge with a file after painting. Bonding primers chemically anchor the gel to the keratin, and the extended cure prevents under‑cured edges that lift. At home, you can copy this by keeping your file away from the tip once colour is on and doubling your cure time on the final layer.
My March Nails always lift at the sides by day 4—why?
The sidewalls aren’t capped properly. After you’ve painted the nail surface, roll the brush flat against the left and right edges so a tiny bead of polish seals the gap where water and hand cream creep underneath. Skipping this leaves a micro‑channel that lifts the polish from the side inward, which looks like poor adhesion but is really just missed coverage.
Which nail shape helps March nail art last longest without chipping?
Almond and oval shapes reduce corner impact because they have no sharp points to knock against keyboards or coat sleeves, so they survive daily wear with fewer chips. If you have short fingers, square or squoval elongates the hand and the corners can be reinforced with a tiny bead of builder gel for extra durability. For longer nails, coffin looks sharp but needs a structured apex through the centre to prevent snapping at the stress point—otherwise stick with almond if your natural nail is thin.